Use these instructions only with the German Auto Solutions M62tu Professional Cam Timing Tool Kit
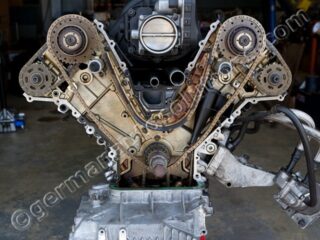
This procedure covers the replacement of timing chains, guides and tensioners, along with timing the VANOS on the BMW M62-tu engine. |
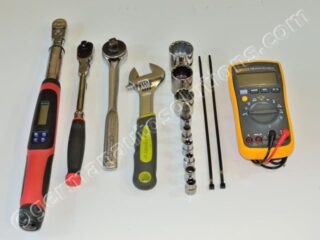
The following tools are required to complete this procedure. This list does not include any other tools that may be required to perform any disassembly or reassembly prior to this procedure.
|
Recommended M62tu parts replacement list with part numbers: Part numbers listed are correct to the best of our knowledge at the time these instructions were written, we include them as a courtesy to our customers and we take no responsibility for their accuracy! This list does not include any parts that may be required to perform any tasks that are not directly a part of this procedure. Required Part – Recommended Part
|
These instructions cover the replacement of the primary and secondary timing chains, timing chain guides and secondary chain tensioners. These instructions also cover the timing of the VANOS system. These instructions assume a starting point that includes removal of all covers and components required to gain access to the cam sprockets and primary timing chain. These instructions are specific to the German Auto Solutions M62tu Cam Timing Tools only. If you have OEM BMW tools or another aftermarket brand of tools, these instruction will not apply to the use of those tools. ****** IMPORTANT – IMPORTANT – IMPORTANT – IMPORTANT – IMPORTANT ****** Read the four paragraphs below before you begin any disassembly of your vehicle. I HIGHLY recommend that you completely read through the entire instructions several times before you begin to familiarize yourself with the procedure. Pay close attention to the first two steps, they will need to be performed during the initial disassembly phase of the engine! If you cannot have a computer nearby during this procedure, print off these PDF instructions. I recommend using a laptop computer or tablet at the vehicle location if available over using the printed PDF instructions. The ability to enlarge the pictures on a computer display will ensure that all the important detail information in the pictures will be visible. Make sure that you read each step fully from beginning to end before you perform any part of a step. Some steps contain multiple procedures, and some steps contain information at the end of the step, that is crucial to completing the step properly. The only time anyone ever encounters a problem when using these instructions is when they start a step before they have read the entire step through first. |
I suggest you have a service manual on hand to guide you through the preliminary procedures that are not covered by these instructions. If you do not have a service manual, below are links to sections of the BMW manual that cover disassembly procedures not covered by these instructions.
|
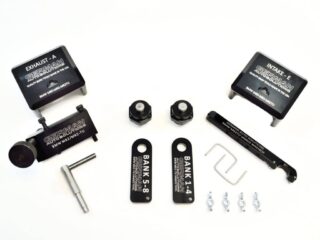
This is the German Auto Solutions M62tu Professional Cam Timing tool kit. These Instructions are only for the use of the German Auto Solutions M62tu Professional Tool Kit.
if you are using the German Auto Solutions M62tu Master Cam Timing Tool Kit, please refer to these instructions: GAS M62 Master Tool Kit Instructions.
Newer style tool kits are black instead of red and the VANOS timing plates have been updated and look different than what is shown in the instructions. The updates DO NOT affect the use of the tool and these instructions are valid for all versions of the tool.
These are the tools required to perform the procedures described in these instructions.
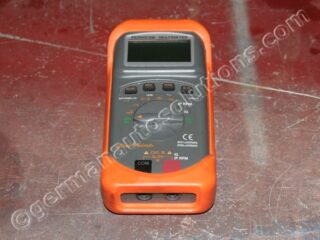
This procedure can be performed without a multimeter, but it is highly recommended that you use one. These instructions cover VANOS timing with and without a multimeter.
The tools are listed separately at the introduction to these instructions.
***** WARNING *****
Harmonic Balancer Hub Bolt Removal
#2
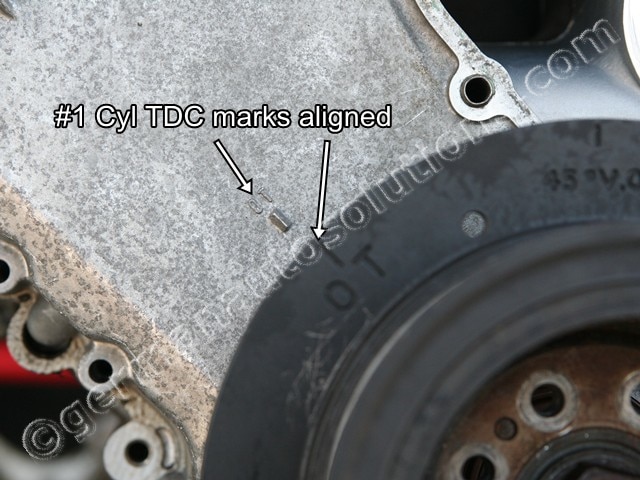
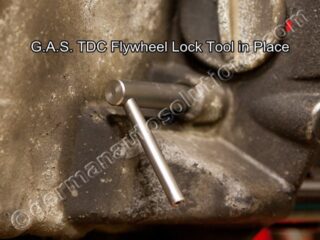
Make sure that you have set cylinder number one piston at TDC (Top Dead Center) of the compression stroke, and that you have installed the TDC flywheel lock pin that comes with the kit.
On some vehicles the steering wheel needs to be turned to full left in order for the tool to clear the steering linkage.
Verify that the lock pin is engaged by trying to rotate the crankshaft using a socket and ratchet on the front balancer bolt. Use just enough force to verify that the pin is engaged.
#6
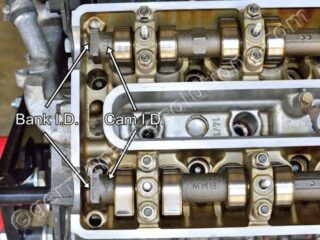
The camshafts are marked with identification numbers.
The left hand side of the engine (as seen when facing the front of the engine) is bank 1-4 and the right side is bank 5-8.
Intake cams are marked with the letter “E” and exhaust cams with the letter “A”.
These markings will be important when choosing the proper cam lock blocks and VANOS timing plates during this procedure.
#7
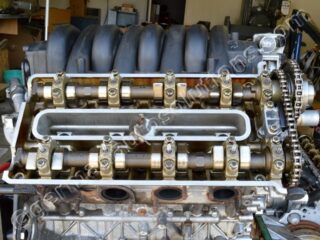
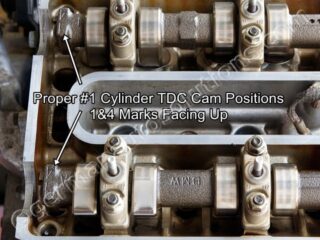
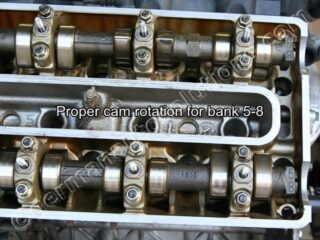
With the crankshaft locked at #1 cylinder TDC position, your bank 1-4 and 5-8 cam markings should be facing up. If the markings are facing down, rotate the crankshaft one full revolution and reinstall the TDC lock pin. See step #70 for an easy way to help find TDC again if you need to rotate the crank.
The square boss on the end of the intake cam (“E”) that the arrows are pointing to, could be rotated clockwise from what is shown in the picture. The intake cam rotation is dependant on the position of the intake VANOS unit. Anything from square to the head surface to about 20 degrees clockwise rotation is normal.
The square boss on the end of the exhaust cam (“A”) that the arrows are pointing to, should appear to be rotated slightly clockwise from square to the head surface. This is the normal timing position of the exhaust camshaft.
#9
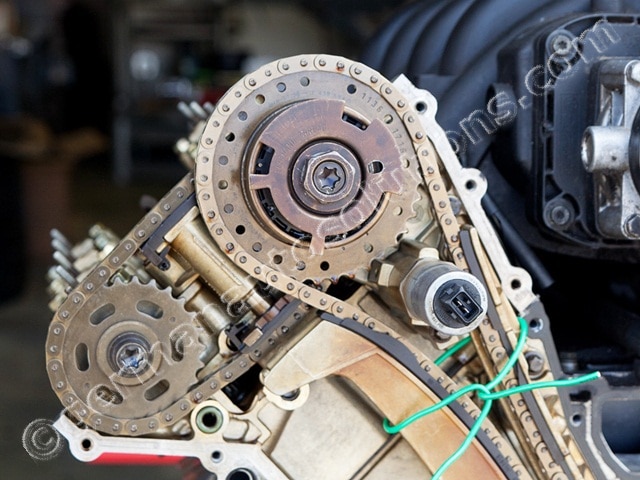
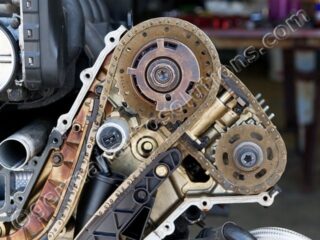
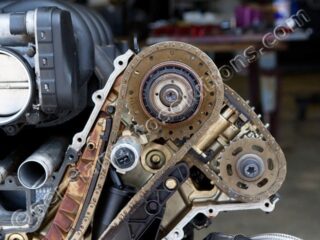
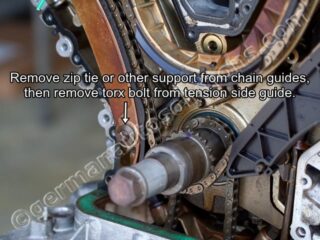
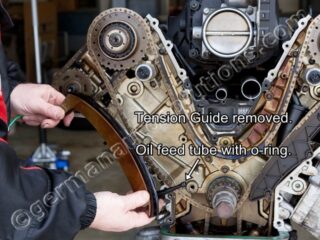
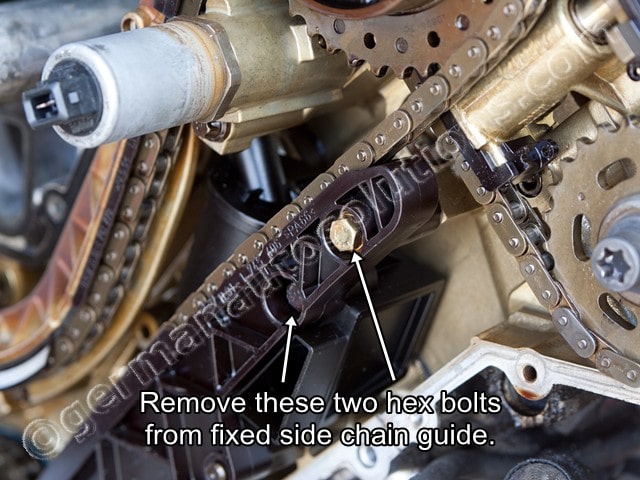
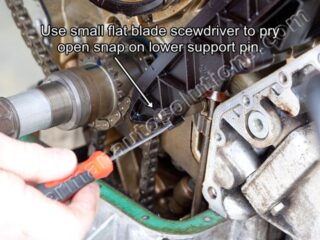
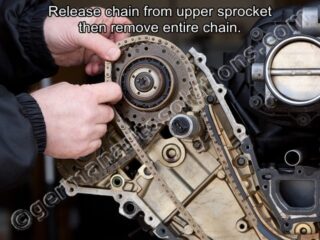
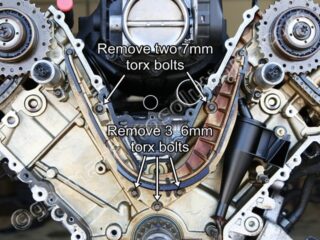
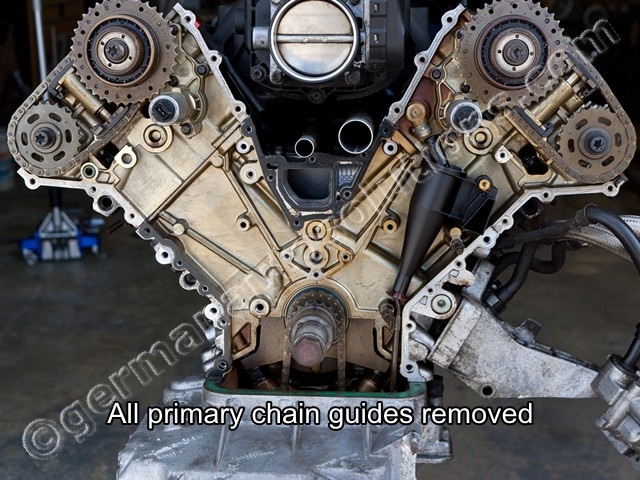
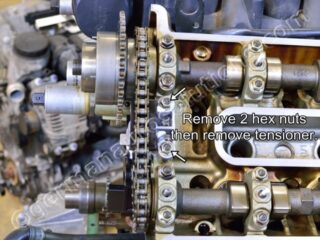
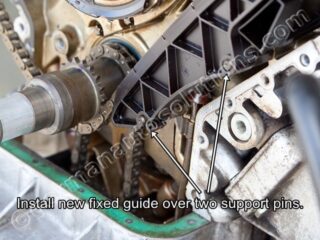
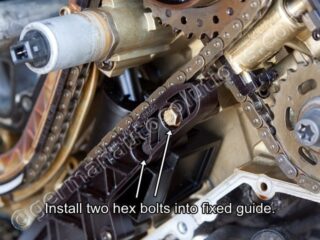
We will now start the disassembly of the primary timing chain guides.
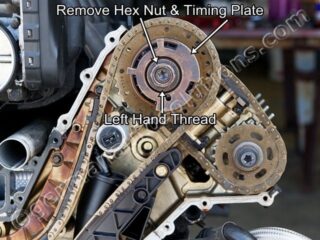
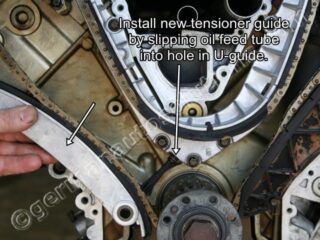
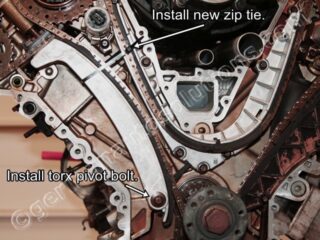
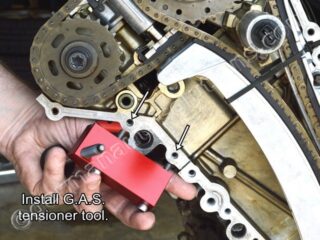
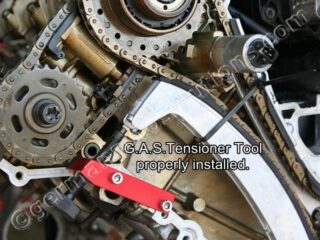
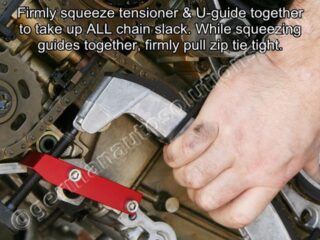
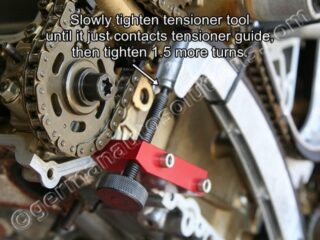
Note the twisted wire holding the tensioner chain guides together. A long zip tie is the preferred method of securing the guide, but as you can see, even a piece of twisted wire is fine during disassembly. Whatever you use, just make sure that it holds the chain guides together tight enough so that you can remove the VANOS timing plate nuts in the next step.
You will want to use quality zip ties during the assembly and timing phase of the procedure.
#15
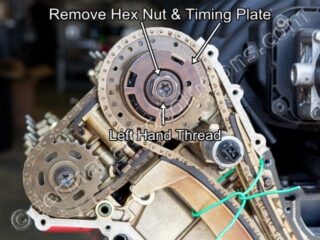
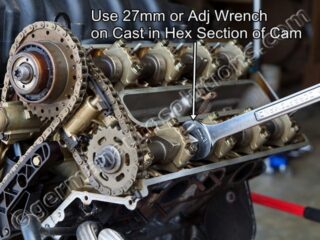
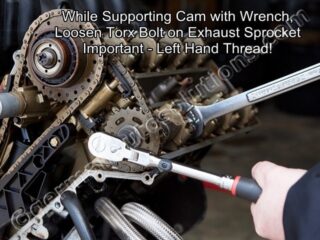
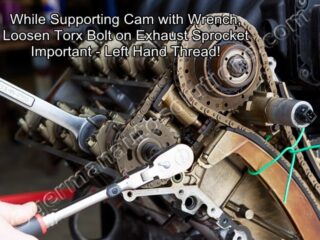
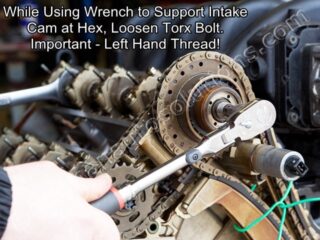
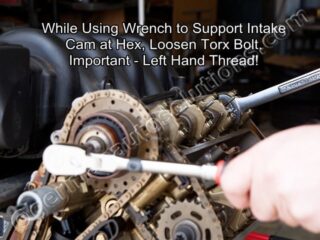
In the following steps you will need to support the camshaft with a 27mm open end or adjustable wrench placed over the cast hex shaped portion of the camshaft as shown.
Note: The cast hex on the intake and exhaust cams are in different positions. The exhaust hex is close to the front of the cam and the intake hex is close to the rear of the cam.
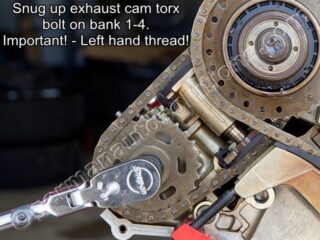
Important! – Bolt is left hand thread.
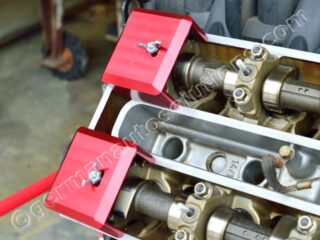
A word about your German Auto Solutions Cam Lock Blocks
Your German Auto Solutions Cam Lock Blocks are made from aerospace grade aluminum alloy with the addition of a very hard anodized coating. If you treat them properly they will last a lifetime. Once they are installed onto the cylinder head they are extremely strong and durable. The only place you need to exercise special care is when installing or removing them from the camshafts.
The lock blocks are machined to a precision fit to the camshafts, and if installed correctly, will slip easily into place. If you do not line up the cams properly and you try to force or pound the blocks into place you can damage the aluminum alloy under the hard coating. If the lock blocks do not slide into place with very light hand pressure there is something wrong. Either there is damage to the end of the camshaft or you do not have the cam positioned properly. Even a small nick on the square machined end of the camshafts can cause a problem. If they do not slide easily into place, stop and find out why, then correct the problem.
Never try to rotate the cams with the lock blocks partially in place unless you are in the process of sliding them on or off!
#20
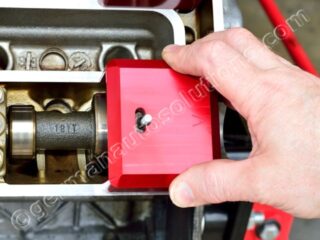
You will now install the camshaft lock blocks starting with cylinder bank 5-8.
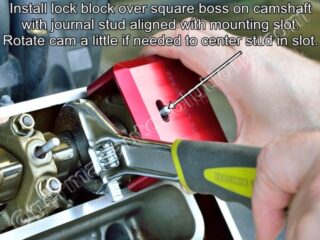
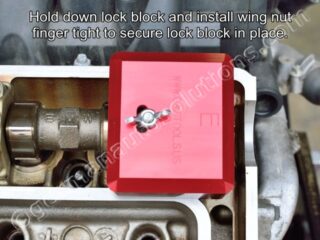
Start by making sure the square boss on the end of the intake cam is close to square with head surface and that the “E” marking is facing up. Use a wrench on the hex section of the cam to rotate the cam to the proper position.
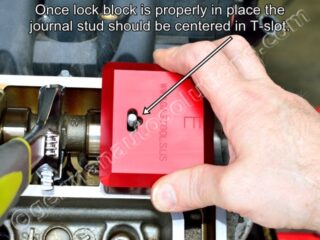
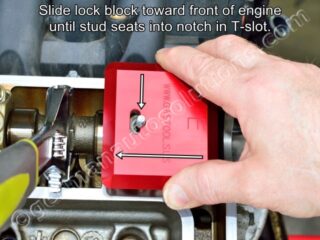
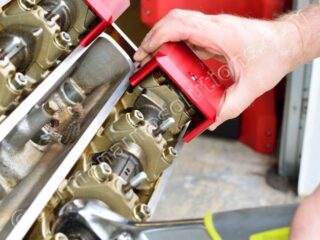
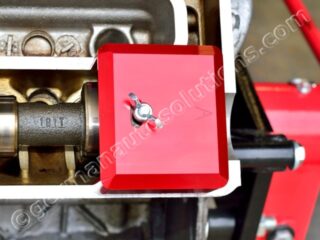
Using a Lock Block marked “E”, position the block with the T-slot in the block aligned with the stud. If necessary rotate the camshaft with the wrench a little until the stud is approximately centered in slot as shown, then slip the block into place.
#21
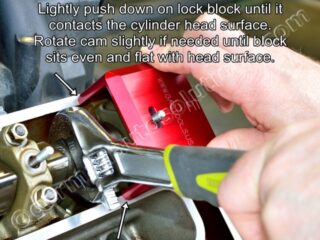
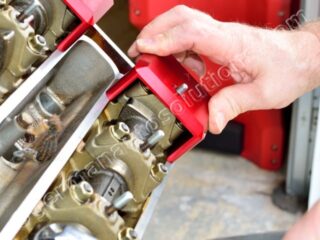
Lightly push down on block until it seats against cylinder head surface. Rock the camshaft a little back or forth if necessary until block sits flat to head.
DO NOT FORCE OR POUND THE BLOCK INTO PLACE.
If everything is properly aligned the blocks will easily slide into place. If they don’t, find out why, do not force them down!
#25
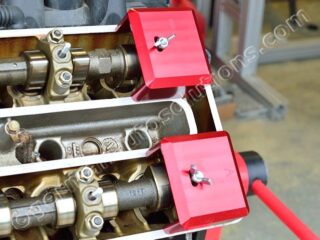
We will now repeat the procedure on the exhaust camshaft. Exhaust cam pictures lack the text of the intake cam pictures. The procedure is identical.
Start by making sure the square boss on the end of the exhaust cam is close to square with head surface and that the “A” marking is facing up. Use a wrench on the hex section of the cam to rotate the cam to the proper position.
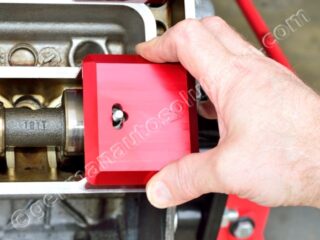
Using a Lock Block marked “A”, position the block with the T-slot in block aligned with the stud. If necessary rotate the camshaft with the wrench a little until the stud is approximately centered in slot as shown, then slip the block into place.
#26
Lightly push down on the block until it seats against cylinder head surface. Rock camshaft a little back or forth if necessary until block sits flat to the head.
DO NOT FORCE OR POUND BLOCK INTO PLACE.
If everything is properly aligned the blocks will easily slide into place. If they don’t, find out why, do not force them down!
#39
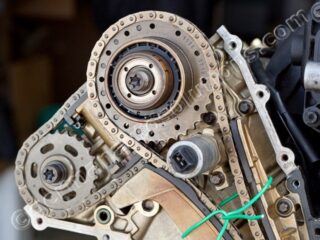
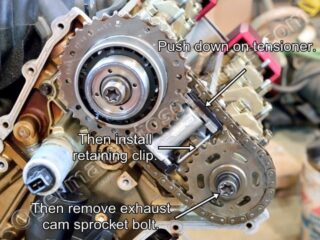
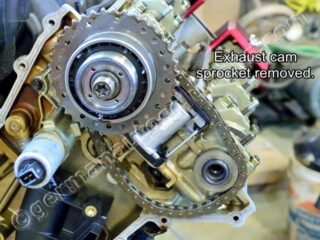
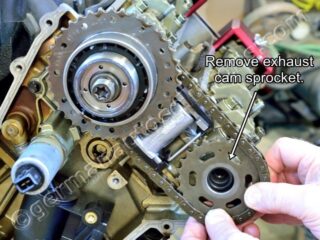
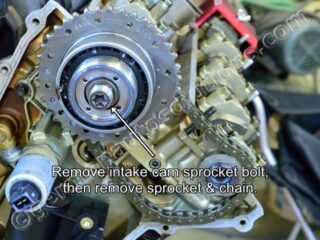
You will now remove the exhaust sprocket on bank 5-8.
Push down on tensioner rail at the location shown in picture until fully compressed, then slide supplied retaining clip into place as shown. There is oil in the tensioner so it may take a little force to fully compress.
Used tensioner plastic rails are very brittle and can easily break at the little clip holes if you are not careful. Don’t worry if you break them, the procedure can easily be accomplished without the clips. If you break the clip holes, just keep the tensioner compressed by hand while removing the exhaust cam sprocket.
Remove exhaust cam sprocket bolt. Bolt should have been loosened in a previous step.
#61
We will start with cylinder bank 5-8.
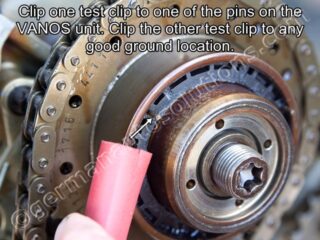
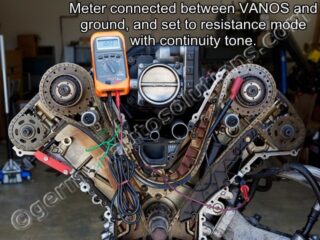
Start by setting your multimeter to the resistance function. If your meter has an audible continuity option, turn that on.
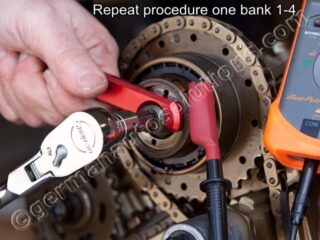
Clip one lead of your multimeter to one of the pins on the VANOS sprocket. Connect the other lead to any good ground location (clean part of the engine block or head).
#63
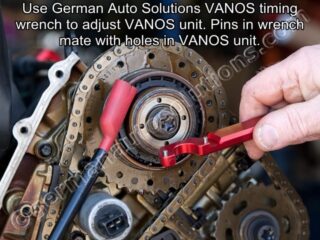
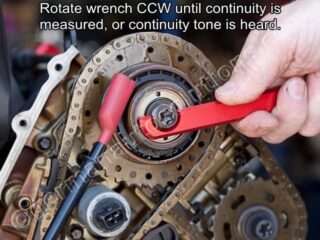
In the next step you will be using your German Auto Solutions VANOS adjusting wrench to rotate the inner section of the VANOS unit counterclockwise until the multimeter reads continuity or an audible tone is heard.
If you are not using a multimeter you will be rotating the inner section of the VANOS unit counterclockwise until you feel a hard stop.
The two pins on the wrench insert into the holes in the VANOS unit. You can engage the wrench at any angle that feels comfortable.
#64
The VANOS unit will have oil remaining inside and may offer some resistance to rotation until the oil is purged. You should be able to feel a hard stop in both rotation directions. Do not use excessive pressure on the wrench, moderate hand pressure is all that is required. I like to rotate the unit back and forth a few times until I can feel the oil has been purged from the unit.
Once you can feel the oil has been purged from the unit, and it turns freely back and forth, rotate CCW until continuity is measured or an audible tone is heard. You should be able to feel a physical hard stop at the point where continuity is made.
If you are not using a multimeter just rotate CCW until you are sure you are up against the hard stop. Again, do not use excessive pressure.
Optional steps!
This is a bit of a pain, but if you are really picky like I am, and you want your VANOS timing to be as accurate as possible, you can perform these extra steps. Non-psychotic people can skip to step #71.
Since the timing chain and guides tend to settle into place a little when the crankshaft is rotated, it helps accuracy to manually turn the engine over then re-set the timing. This requires quite a bit of extra work and is not required, so perform these extra steps only if you have the extra time and are a perfectionist.
WARNING – If you decide to perform these extra step make sure that the cam bolts that you just snuged up are tight enough to prevent the cam sprockets from slipping while rotating the crankshaft. 40-50ft/lbs
To perform the extra steps start by removing all of the cam lock blocks and the TDC lock pin.
NOTE: The intake cams may snap to a different position when the intake cam lock blocks are removed. This is normal.
#70
Once the cam lock blocks and TDC lock pin have been removed, rotate the crankshaft CLOCKWISE (as facing the front of the engine) 720 degrees (two complete revolutions) until the cams end up back to their starting position. While rotating the crankshaft, try to lightly increase the tension on the timing chain tensioner tool thumbscrew. The thumbscrew will usually easily turn another 1/2 turn or so while you are applying rotating force on the crankshaft. You do not need to over tighten the thumbscrew, if it doesn’t turn easily, don’t force it. Verify the camshaft markings again with steps #7 and #8 then reinstall the TDC lock pin.
Loosen, but do not remove, the intake and exhaust cam sprocket Torx head bolts. Set the bolts finger tight, then back them out 1/4 turn. Install the cam lock blocks again using steps #20 – #31, then repeat VANOS timing steps #62 – #69.
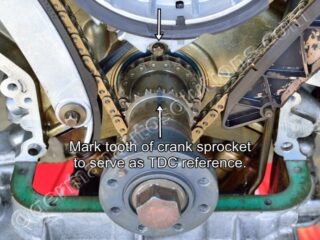
You can use the picture at left to mark the crankshaft to make it easier to find TDC again after you rotate the crankshaft.
#71
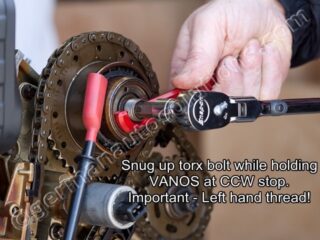
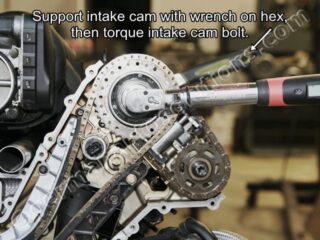
You will now torque the intake cam sprocket bolts. Make sure to support the camshafts with a wrench on the hex section of the cams while torquing. Do not apply the tightening torque against the cam lock blocks.
Torque the intake cam bolts on both cylinder banks to 110Nm – 81ft/lbs.
Important! – Left hand threads!
#72
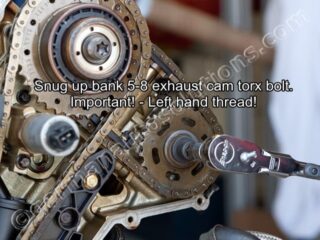
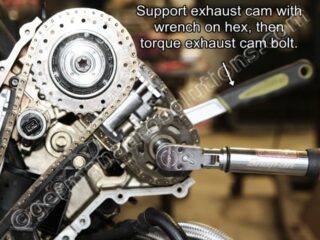
You will now torque the exhaust cam sprocket bolts. Make sure to support the camshafts with a wrench on the hex section of the cams while torquing. Do not apply the tightening torque against the cam lock blocks.
Torque the exhaust cam bolts on both cylinder banks to 125Nm – 92ft/lbs.
Important! – Left hand threads!
#77
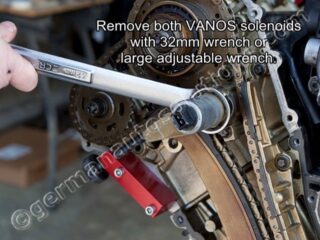
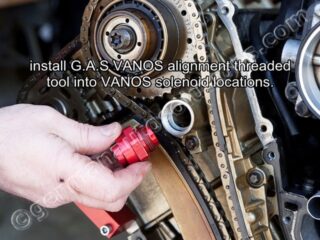
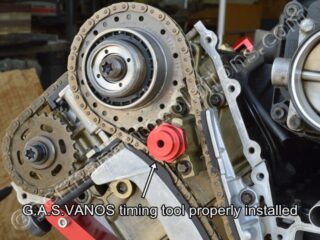
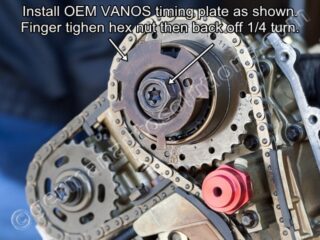
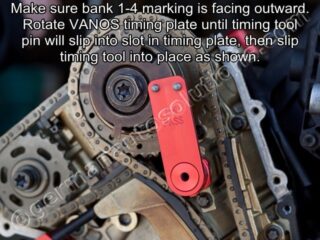
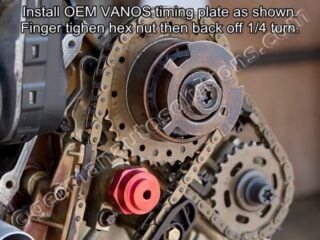
Make sure that the 1-4 markings on the German Auto Solutions timing tool are facing outward. NOTE! Timing tool is positioned to the right (inboard) side of the sensor wheel.
Rotate the VANOS sensor wheel until the pin on the timing tool will slip into the slot in the sensor wheel, then slip the timing tool into place as shown.
The hole in the bottom of the timing tool is a very close precision fit to the boss on the threaded tool. It will only slip into place when lined up properly. Do not force or pound the timing tool into position. If it doesn’t slide on with finger pressure, it’s not lined up properly.
#78
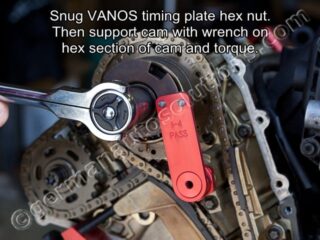
With VANOS timing tool engaged with sensor wheel, snug the sensor wheel hex nut, then torque to 40Nm – 30ft/lbs.
It’s preferred to support the cams with a wrench on the hex section of the cam while you torque the nut, but it isn’t absolutely necessary. The cam lock blocks will support the 30 ft/lb torque spec.
Important! – Left hand threads!
#81
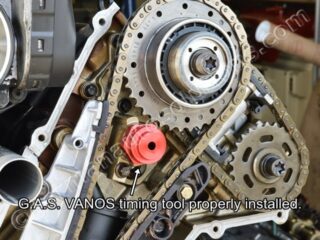
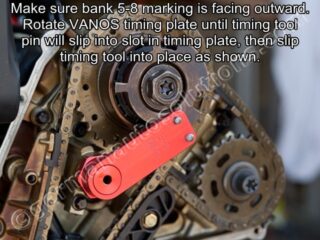
Make sure that the 5-8 markings on the German Auto Solutions timing tool are facing outward. NOTE! Timing tool is positioned to the right (outboard) side of the sensor wheel. Newer style tools are bank specific and cannot be positioned improperly.
Rotate the VANOS sensor wheel until the pin on the timing tool will slip into the slot in the sensor wheel, then slip the timing tool into place as shown.
The hole in the bottom of the timing tool is a very close precision fit to the boss on the threaded tool. It will only slip into place when lined up properly. Do not force or pound the timing tool into position. If it doesn’t slide on with finger pressure, it’s not lined up properly.
#82
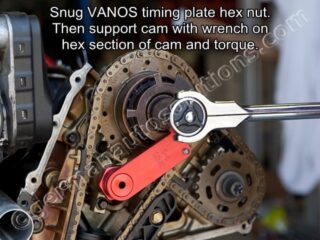
With VANOS timing tool engaged with sensor wheel, snug the sensor wheel hex nut, then torque to 40Nm – 30ft/lbs.
It’s preferred to support the cams with a wrench on the hex section of the cam while you torque the nut, but it isn’t absolutely necessary. The cam lock blocks will support the 30 ft/lb torque spec.
Important! – Left hand threads!
#83
You are now finished with the parts replacement and VANOS timing.
Remove all cam lock blocks. NOTE: The intake cams may snap to a different position when the cam lock blocks are removed. This is OK.
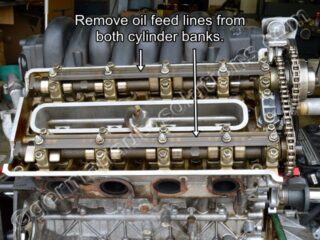
Reinstall the oil feed lines, if you removed the zip tie when installing the G.A.S. tensioner tool, zip tie the chain guides together again then remove the G.A.S timing chain tensioner tool. Leave the zip tie in place until you put the front timing covers and factory tensioner back on.
#84
Remove TDC lock pin tool.
Murphy’s law states that at this point you should rotate the crankshaft a couple of revolutions by hand to verify that nothing is binding. If you feel any binding, (it should feel like it did before you started to take anything apart), stop and find out why before you reassemble everything and attempt to fire the engine.
Thank you for choosing German Auto Solutions Tools.


