OEM BMW Front Control Arm Bushing Removal Instructions
NOTE: These instruction are specific to removing OEM BMW front control arm bushings without the need for specialty puller tools. These instructions only require typical hand tools that are available at you local hardware store. It will also require a rigid way to hold the control arm during the bushing removal. This could be a heavy duty vise mounted to a solid bench, or heavy duty c-clamp to clamp the control arm to a solid bench.
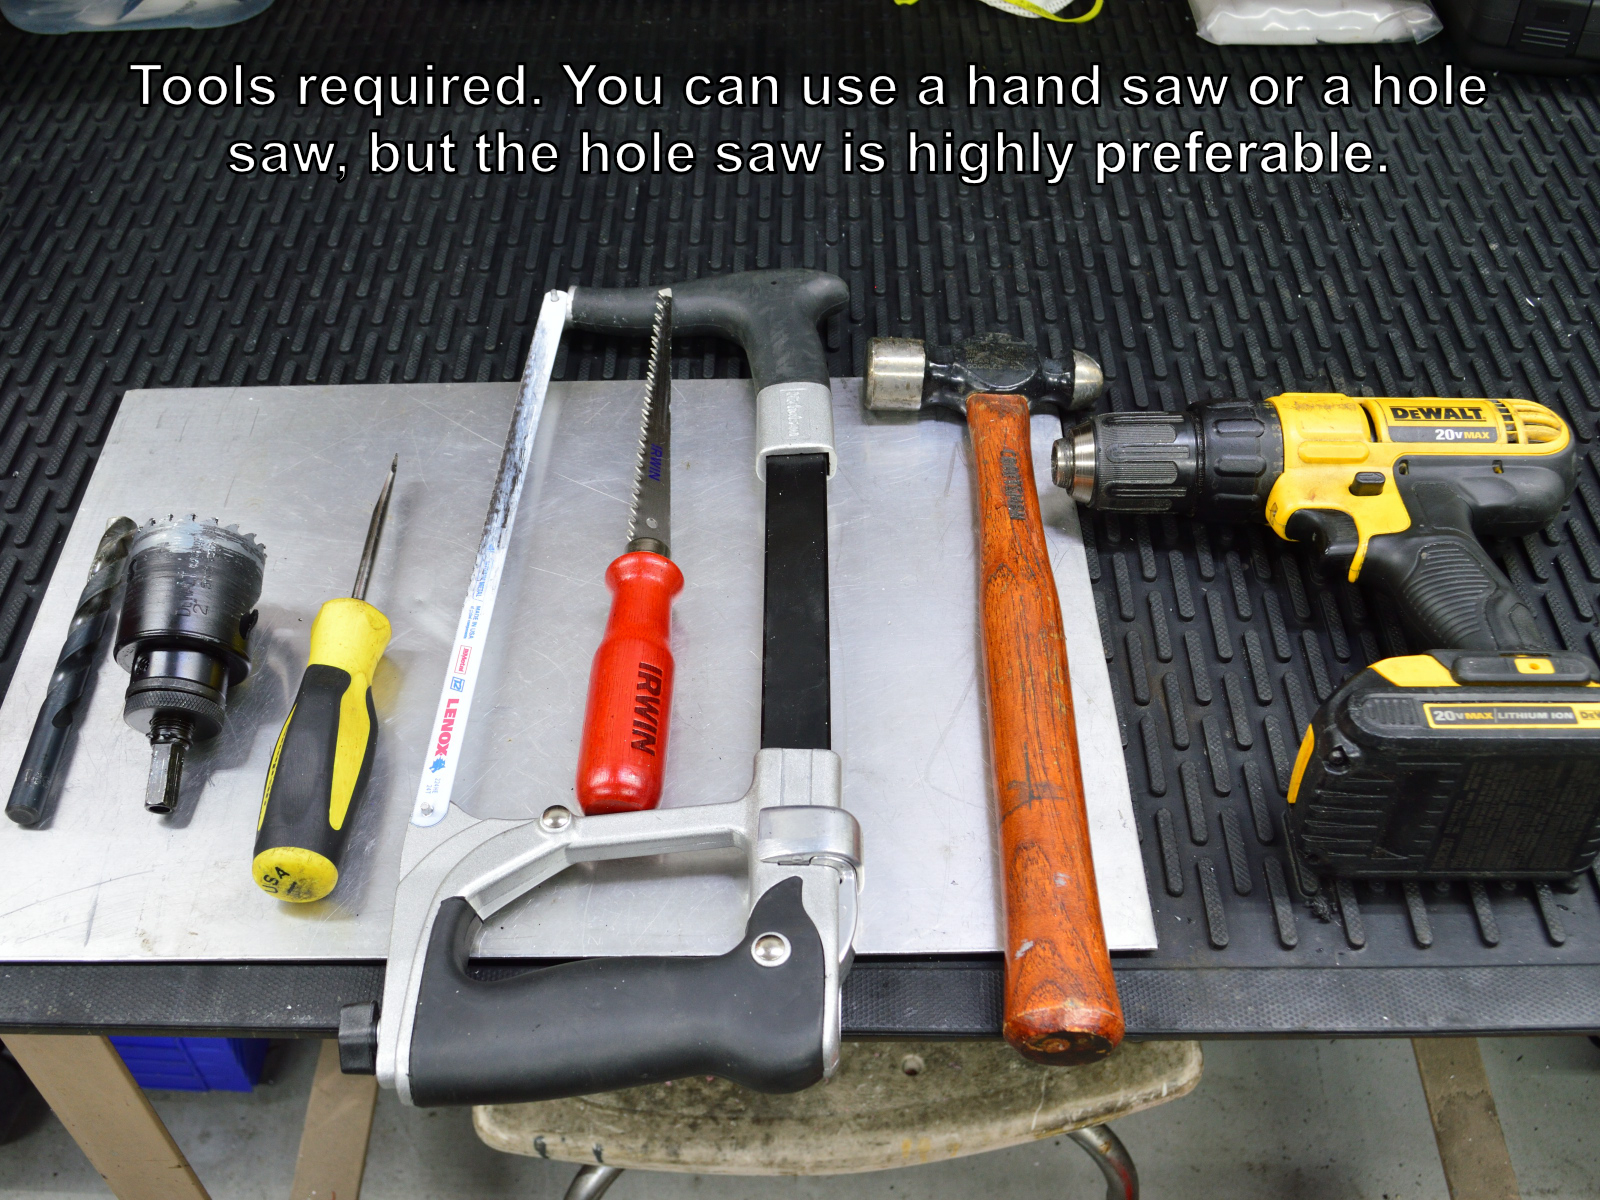
These are the tools required to perform this proceedure.
A solid workbench with a heavy duty vise
Electric or corless drill
Hammer
Hacksaw
Medium or large flat blade screwdriver or drift punch
3/8″ to 1/2″ drill bit
Drywall type hand saw or 1-3/4″ to 2″ hole saw
NOTE! – A hole saw is highly preferred over a hand saw.
#1
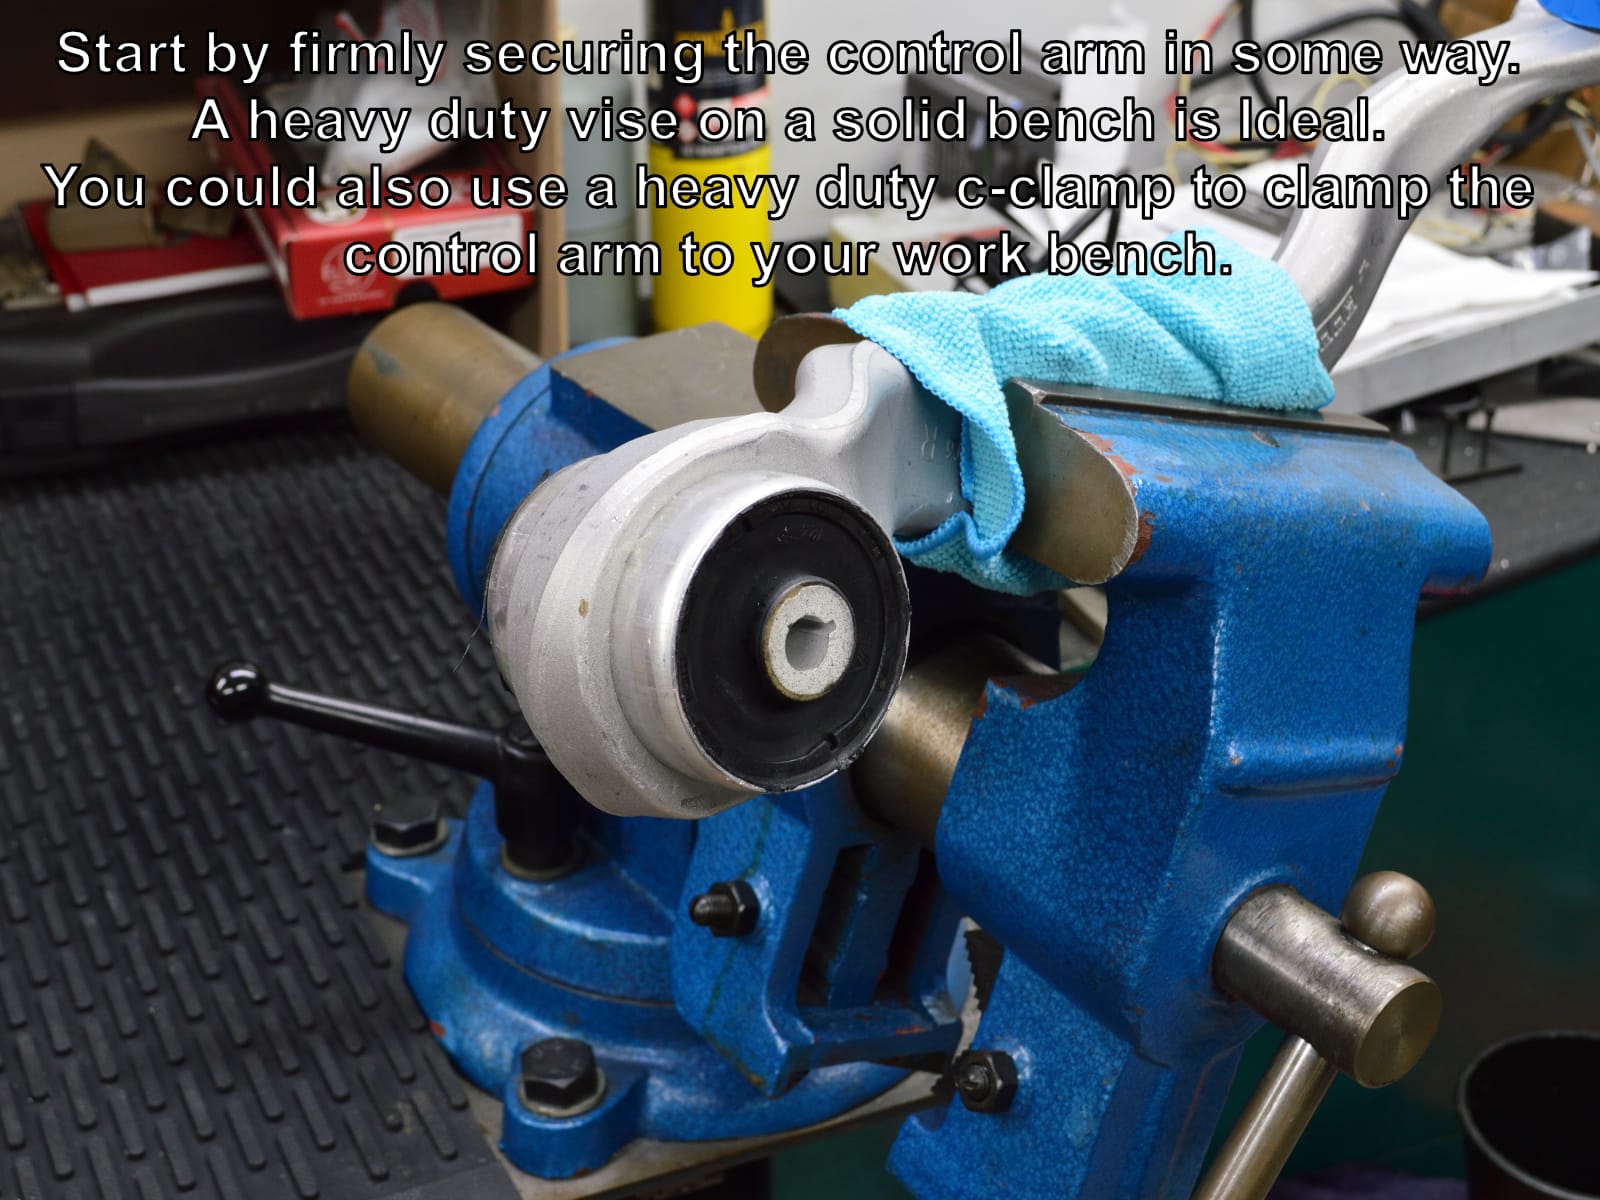
Start by firmly securing the control arm in some way. You can use a heavy duty vise mounted to a solid bench, or you could clamp the control arm to a solid bench using a heavy duty c-clamp.
However you secure the arm, it needs to be rigid enough to prevent the sawing forces from allowing the control to move around.
#2
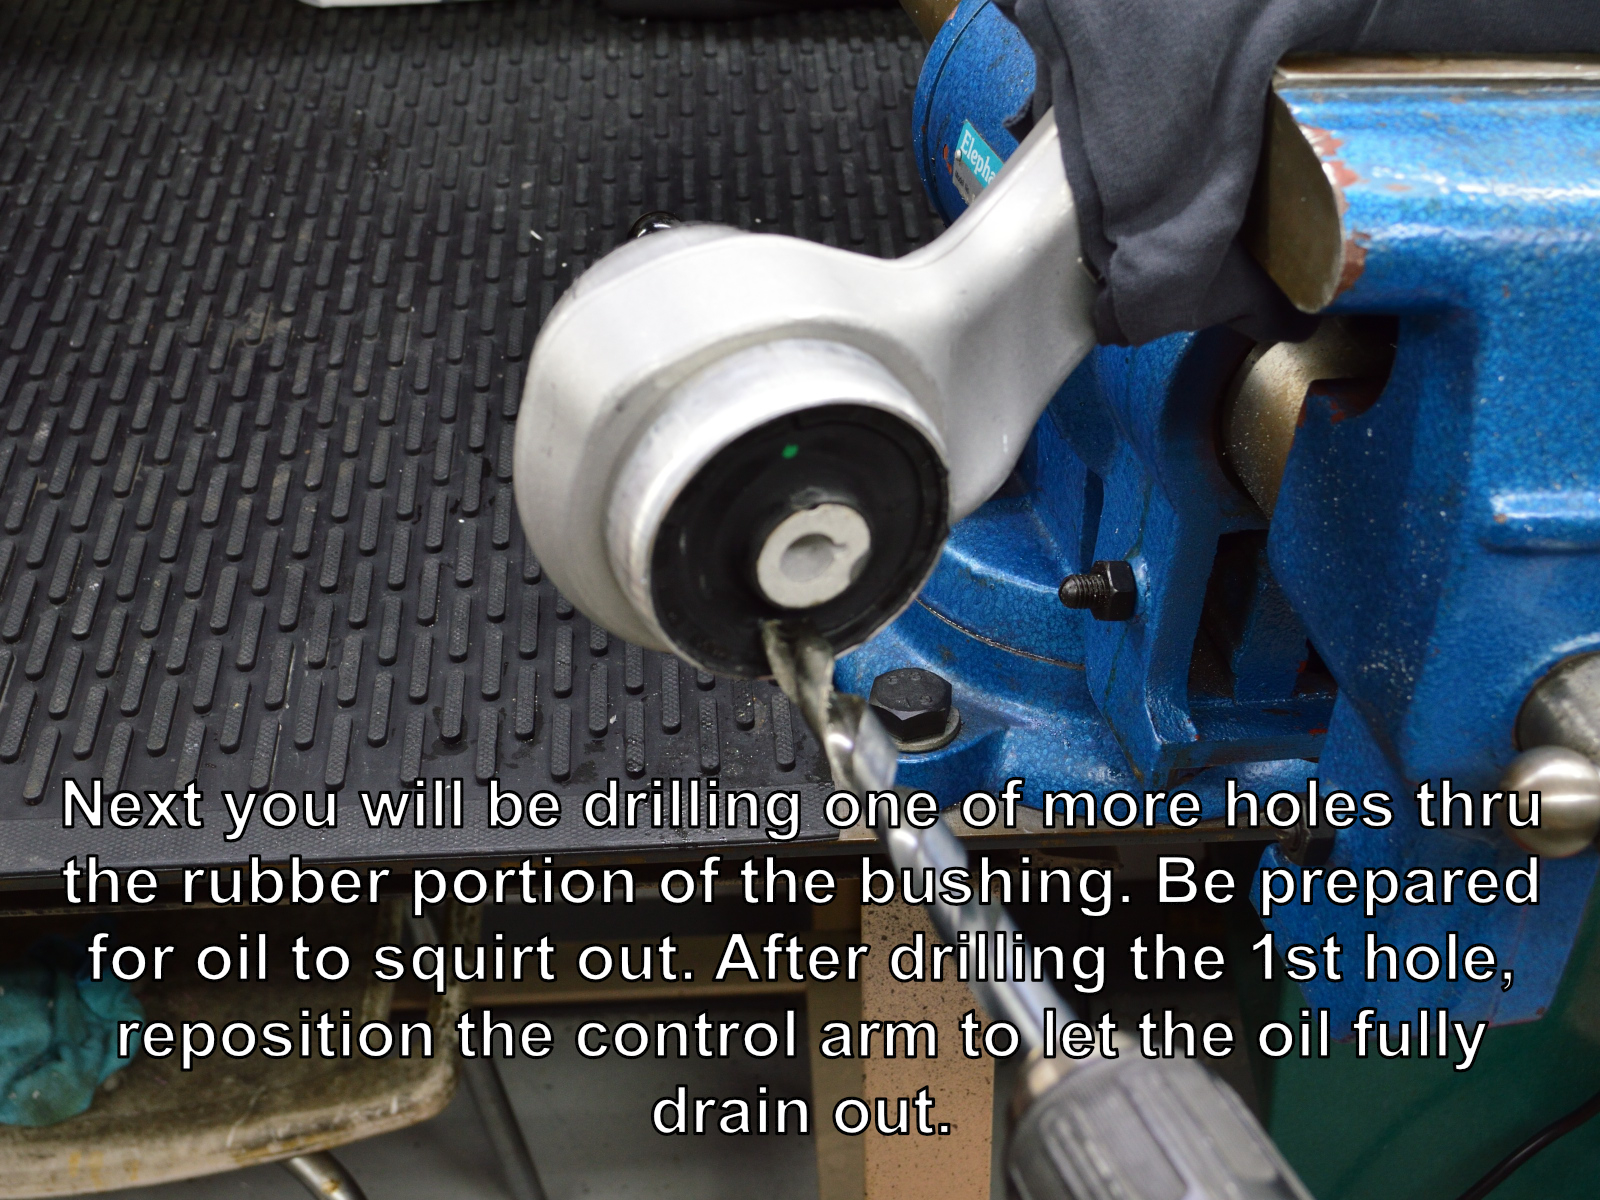
Next you need to drill a hole into the rubber portion of the bushing. Any size drill bit that will fit between the solid center portion and the outer skin could work. 1/2″ diameter seem to be a sweet spot. Start by just going half of the way in instead of all the way thru the bushing. WARNING – For all BMW models except M-versions, oil will squirt out as soon as you drill in the bushing! Be prepared to catch the oil that drains out, and don’t wear your Sunday bests.
Once you’ve created a drain hole, reposition the control arm in such a way as to allow the remaining oil to drain out before proceeding.
#3
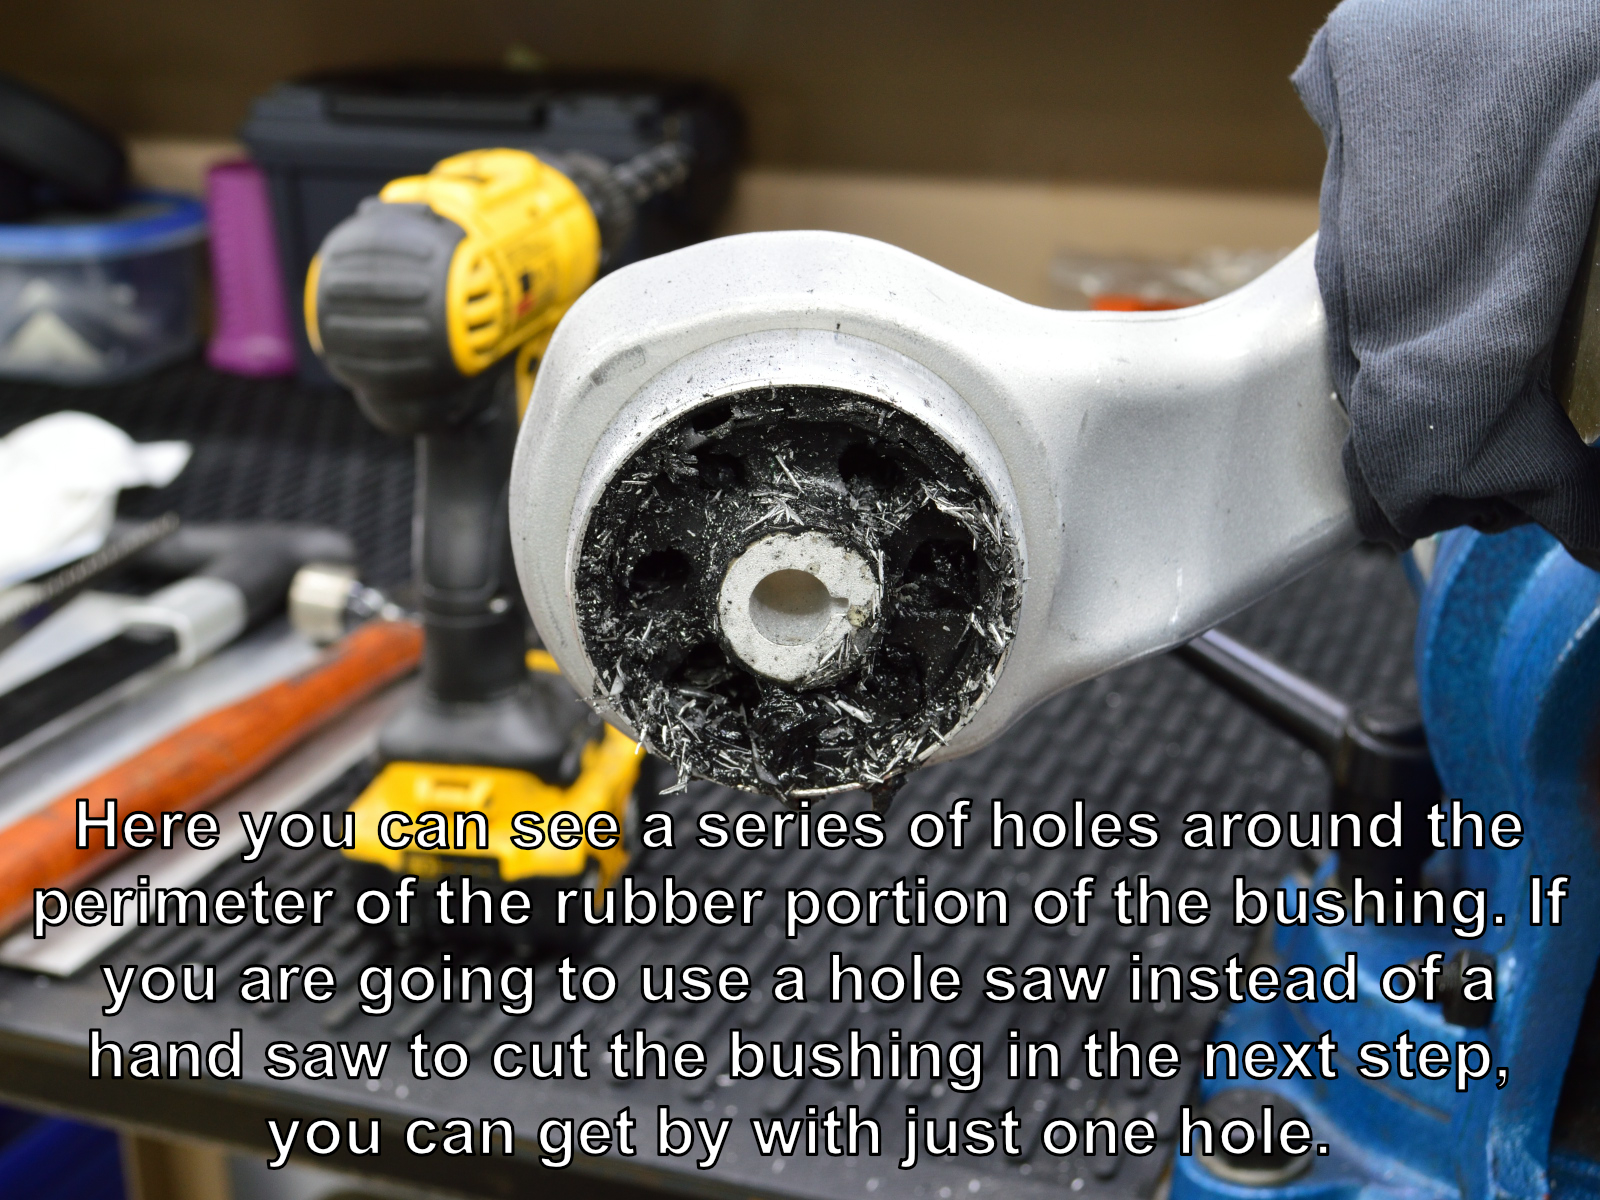
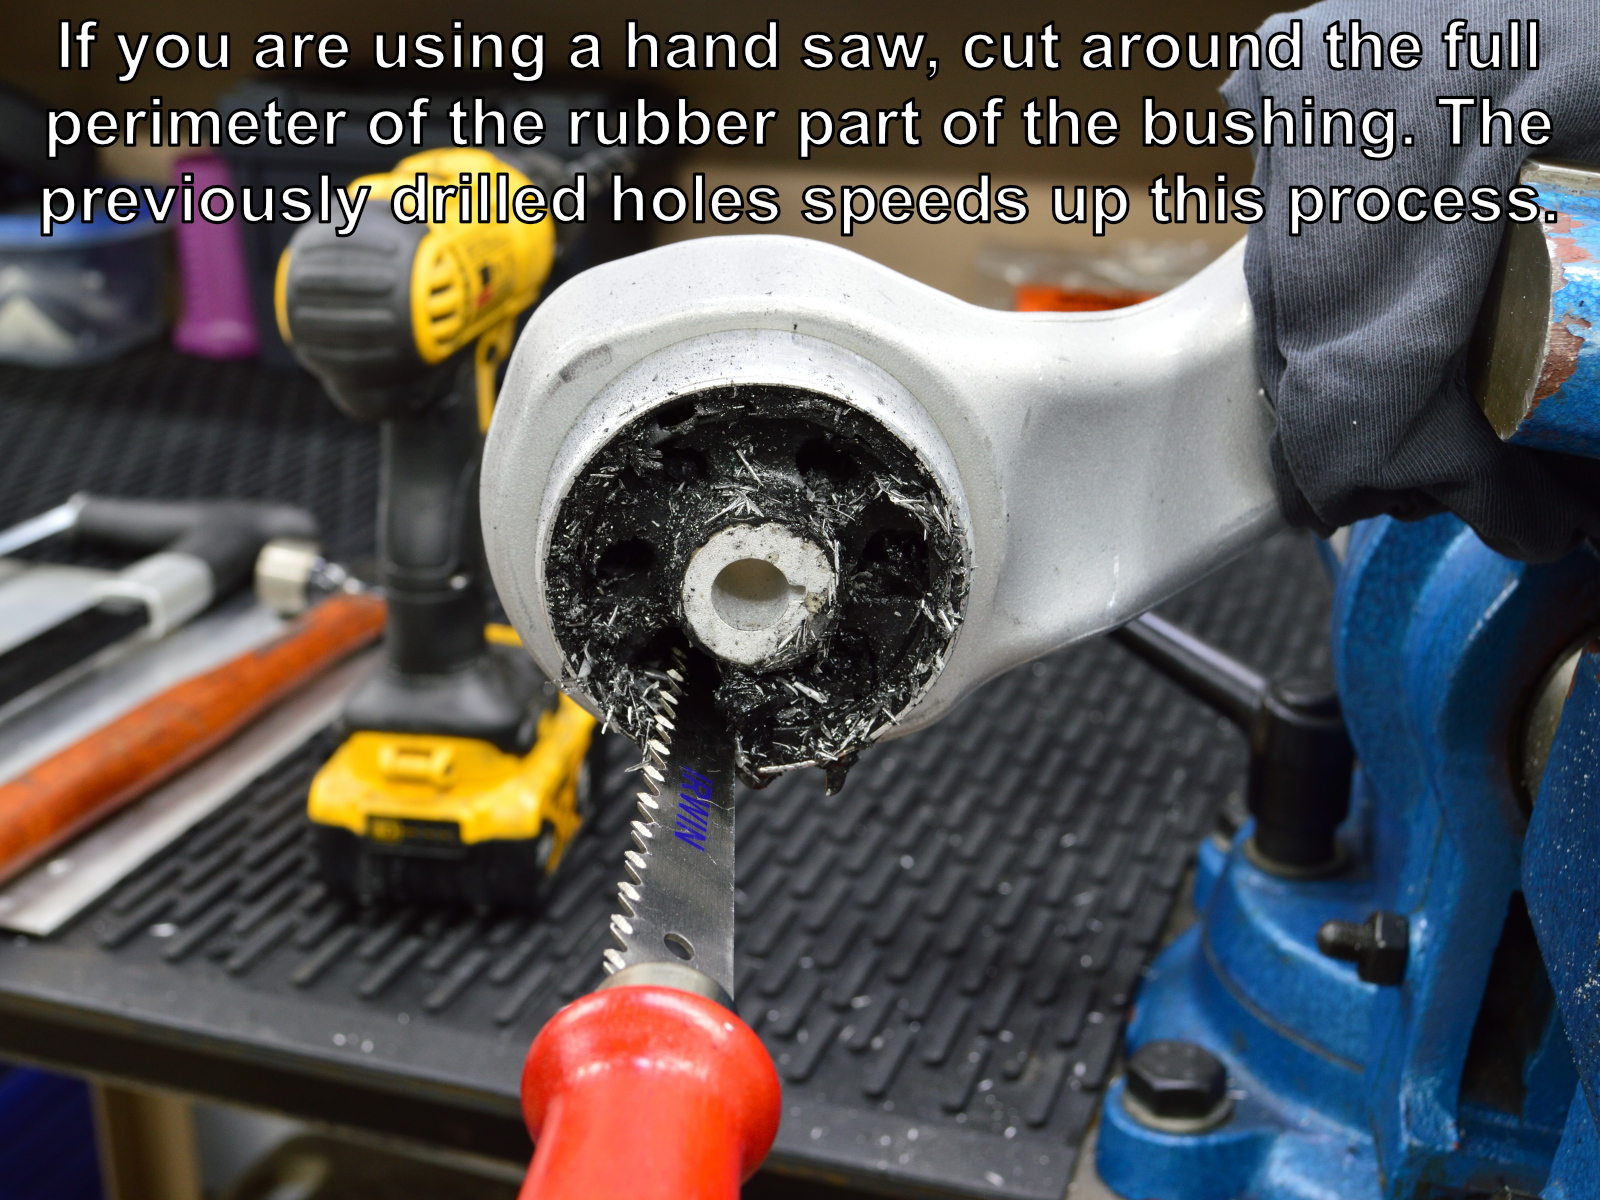
If you plan to use a hand saw to cut out the bushing, it will save you some sawing time by drilling a series of holes closely spaced as shown. This time you will want to drill all of the way thru the bushing. Rocking the drill back and forth once your hole is all of the way thru will help remove some more material and make your sawing go a little easier.
If you are going to use a hole saw (Good Choice), You can get by with just the one hole.
#4
If you are going to use a hole saw, go ahead and skip to the next step.
For those of you that are using a hand saw, cut your way all around the rubber bushing until the center core is separated from the outer section.
#5
If you are using a hand saw, go ahead and skip to the next step.
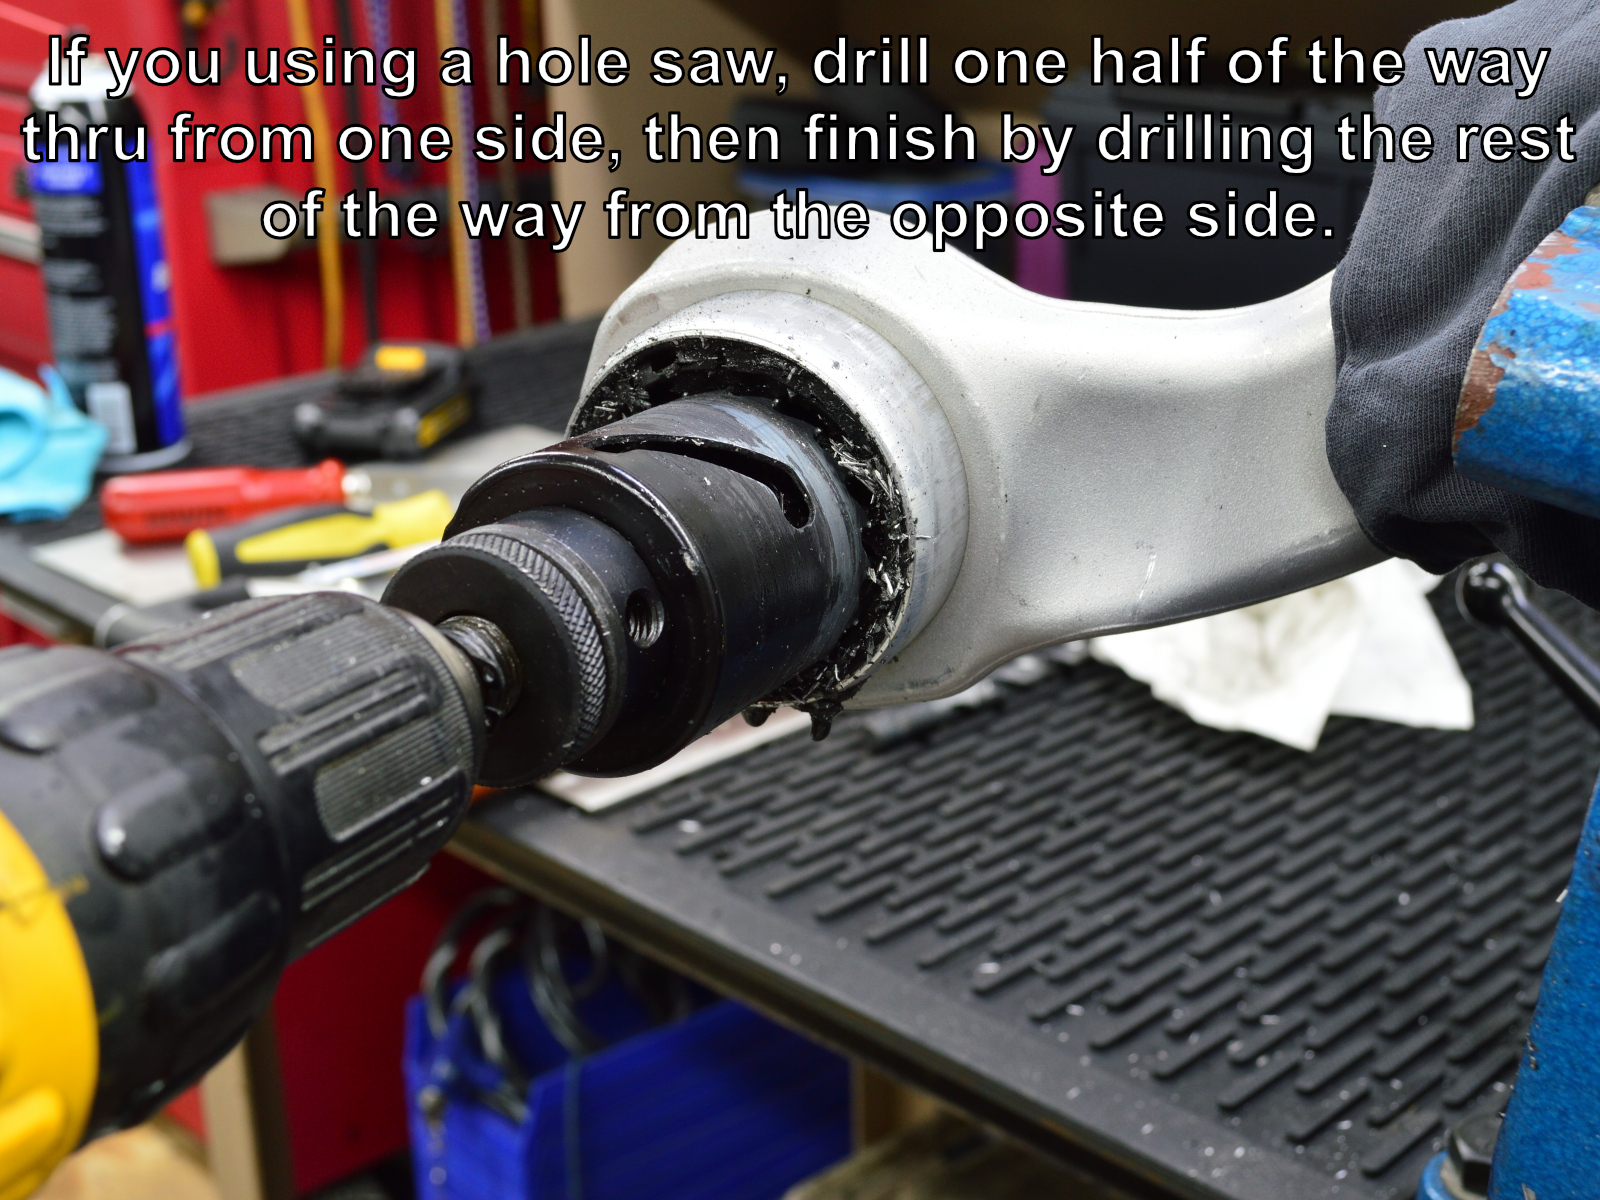
Using the hole saw on the slower speed setting of your drill, drill one half of the way thru the rubber bushing from one side, then repeat from the other side until the center core is separated from the outer section.
WARNING – Your drill is going to intermittently grab hard so make sure that your control arm is very securely mounted and that you are firmly holding the drill.
#6
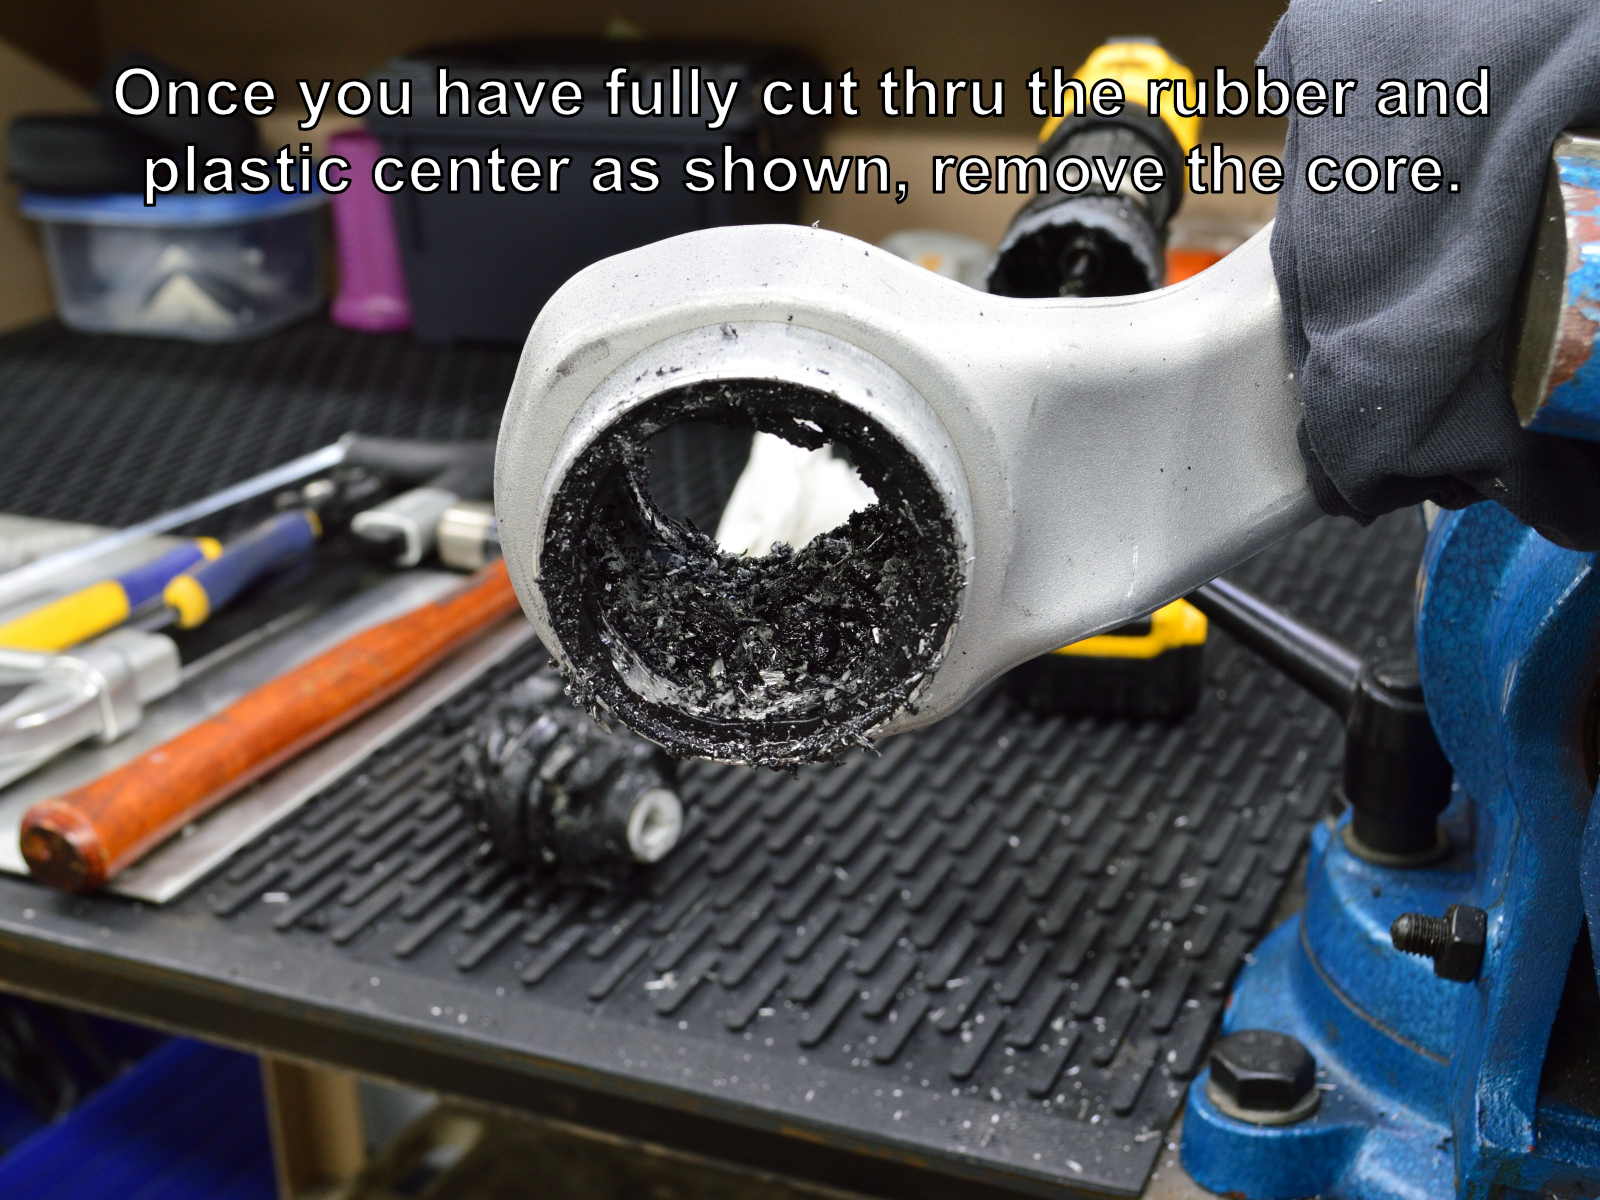
Once you have separated the center core, grab it with a pair of pliers and pull it out of the control arm. You should be left with something resembling what is shown in the picture.
#7
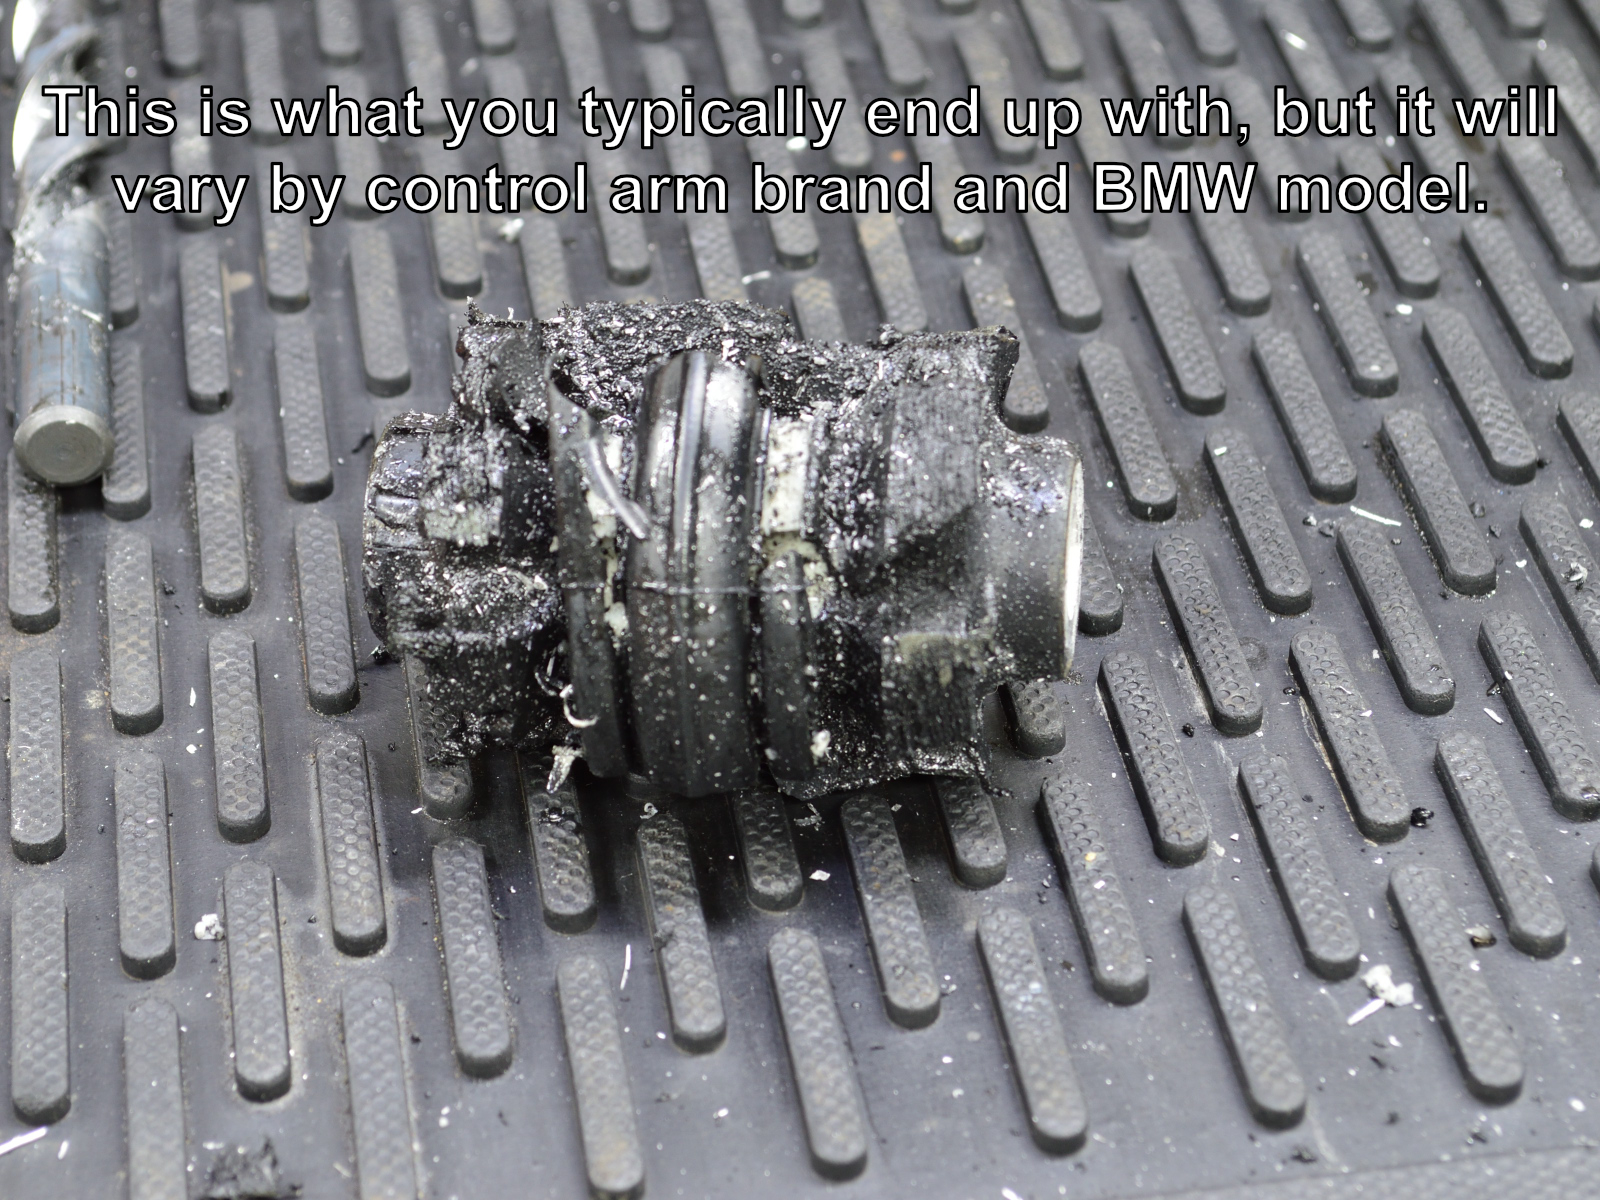
This is the center core removed from the bushing. Different control arm brands and models make look different.
#8
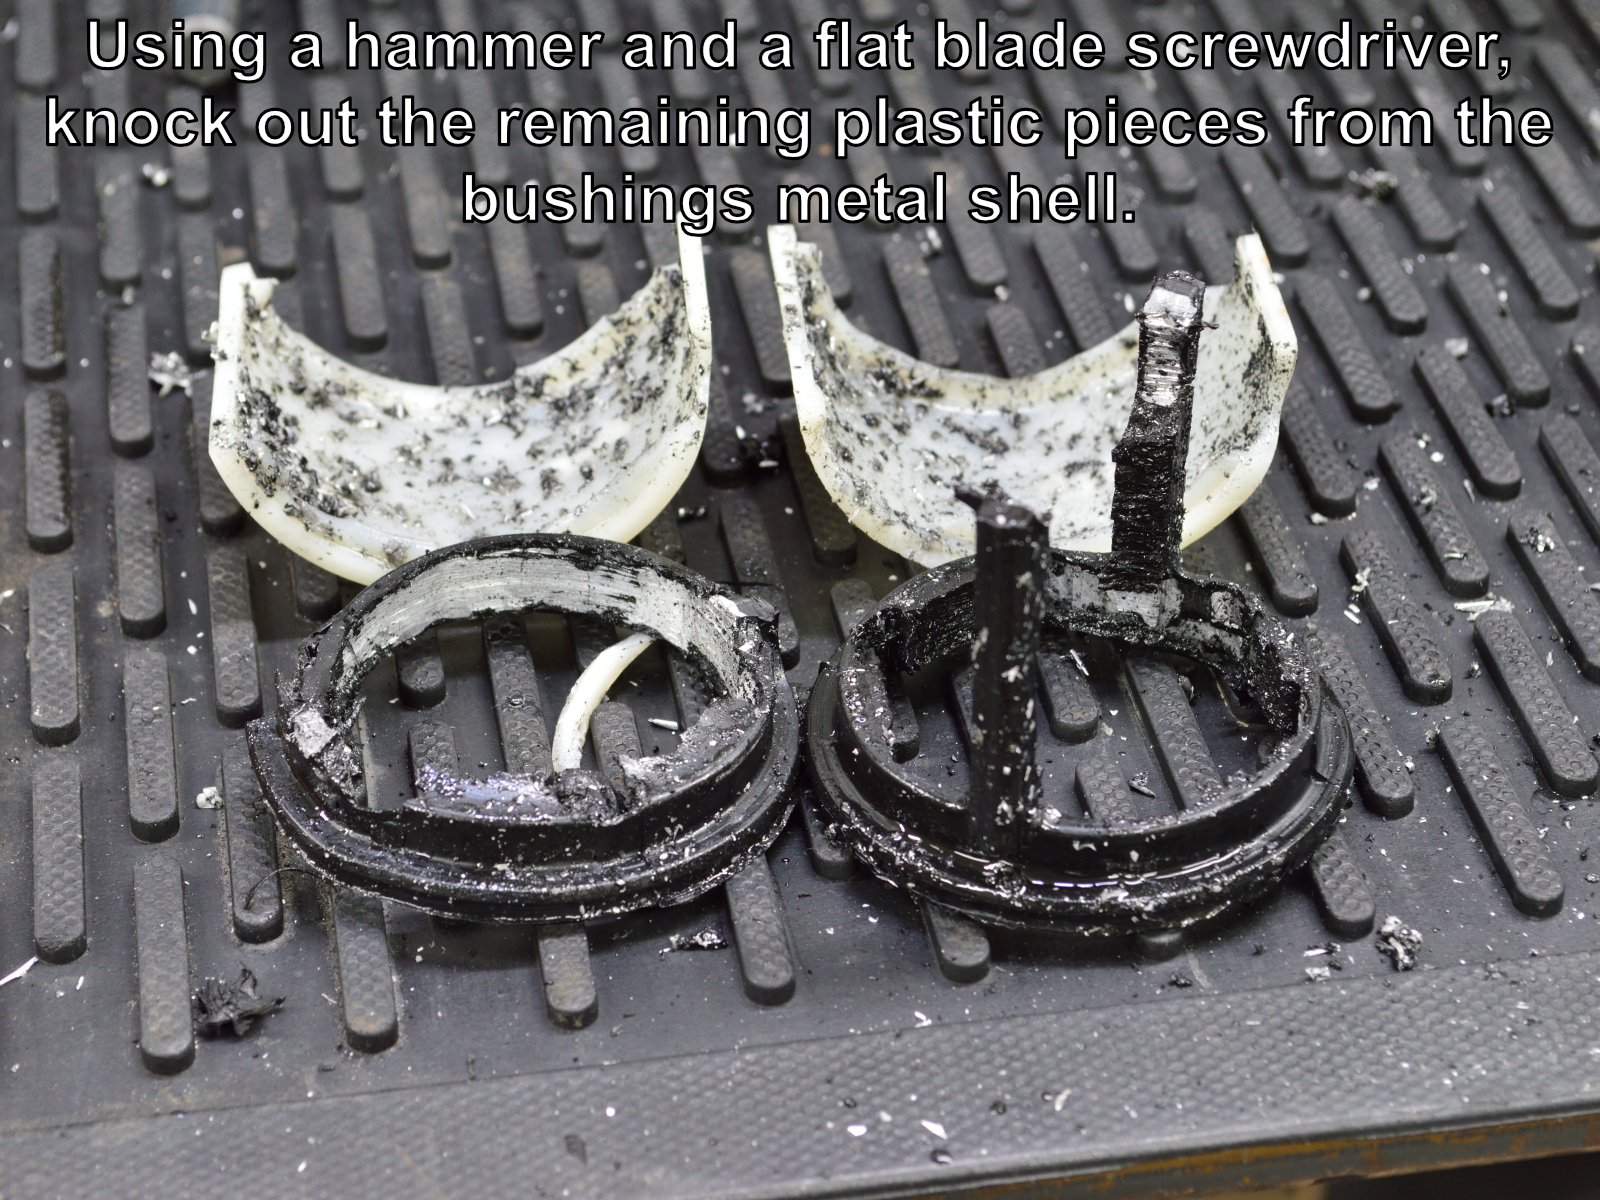
Using a hammer and a flat blade screwdriver or drift punch, knock the remaining plastic pieces out of the control arm outer shell. I’m sorry but the image we took of this step didn’t turn out, but this should be obvious enough that you don’t need to see a picture of the hammer and screw driver.
#9
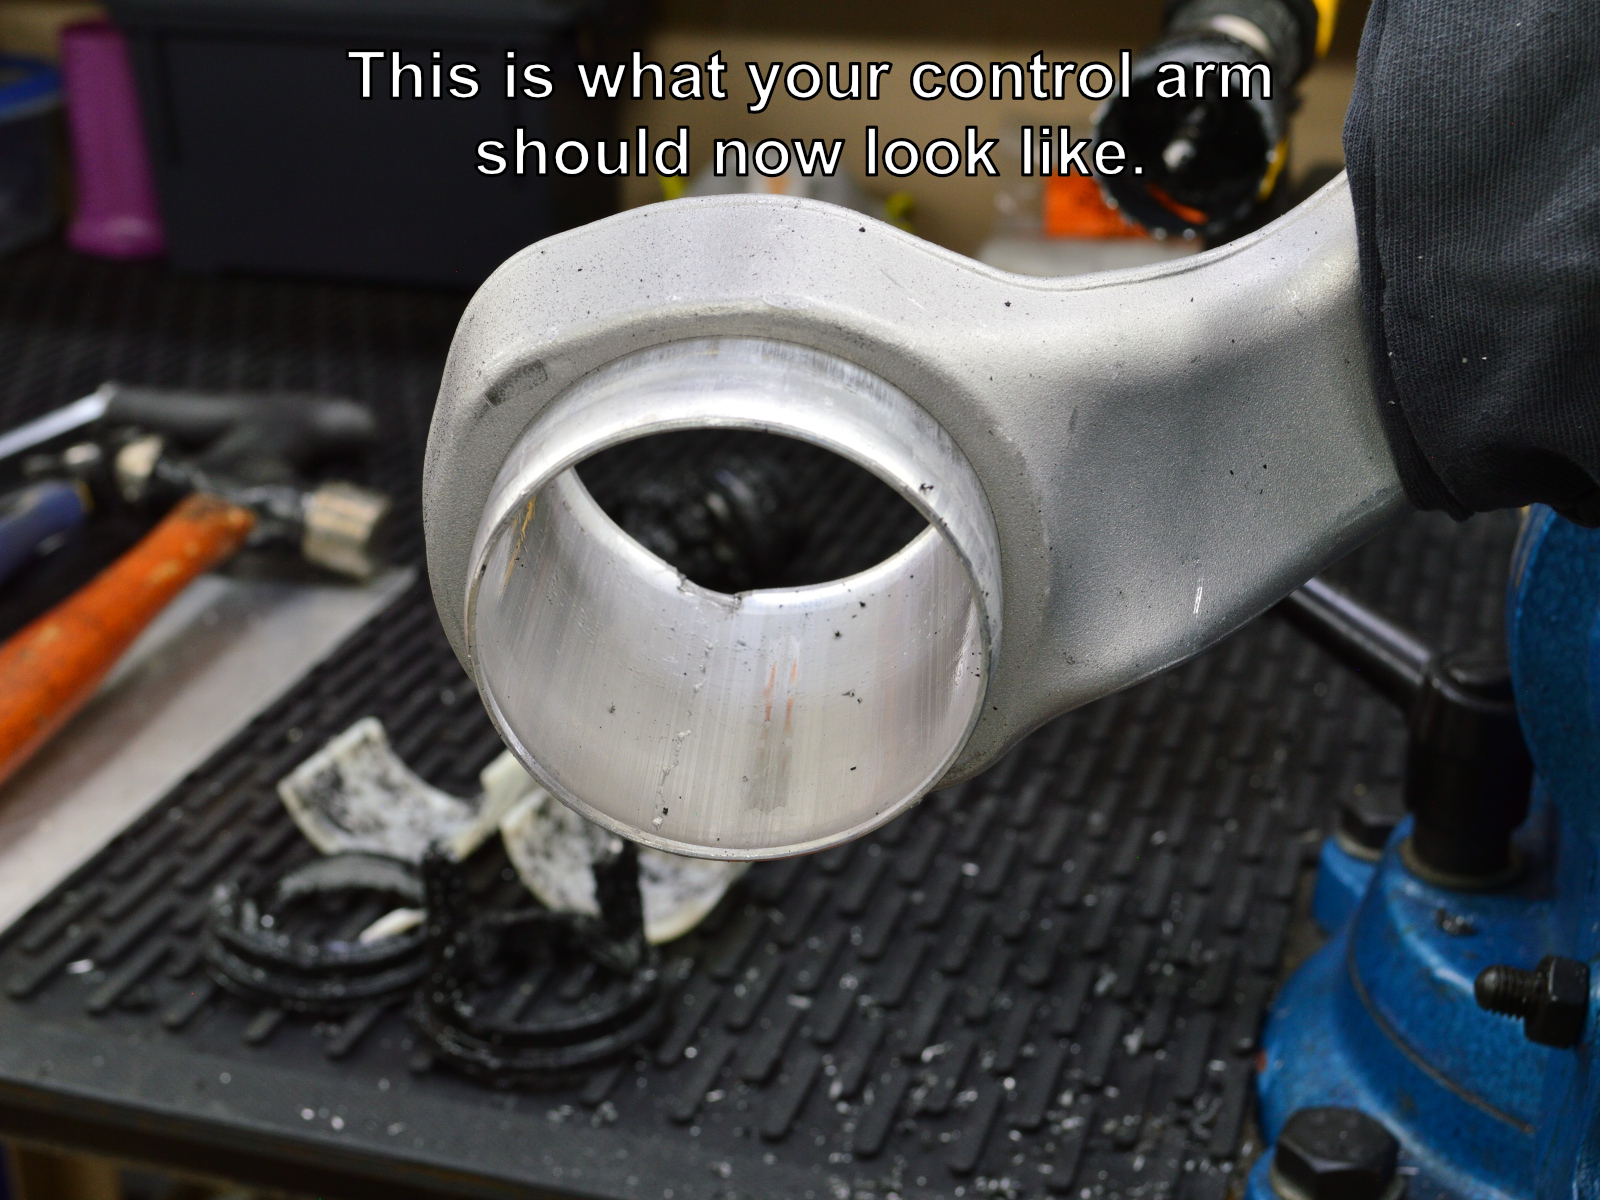
You should now be let with a control arm with just an empty outer shell as shown.
#10
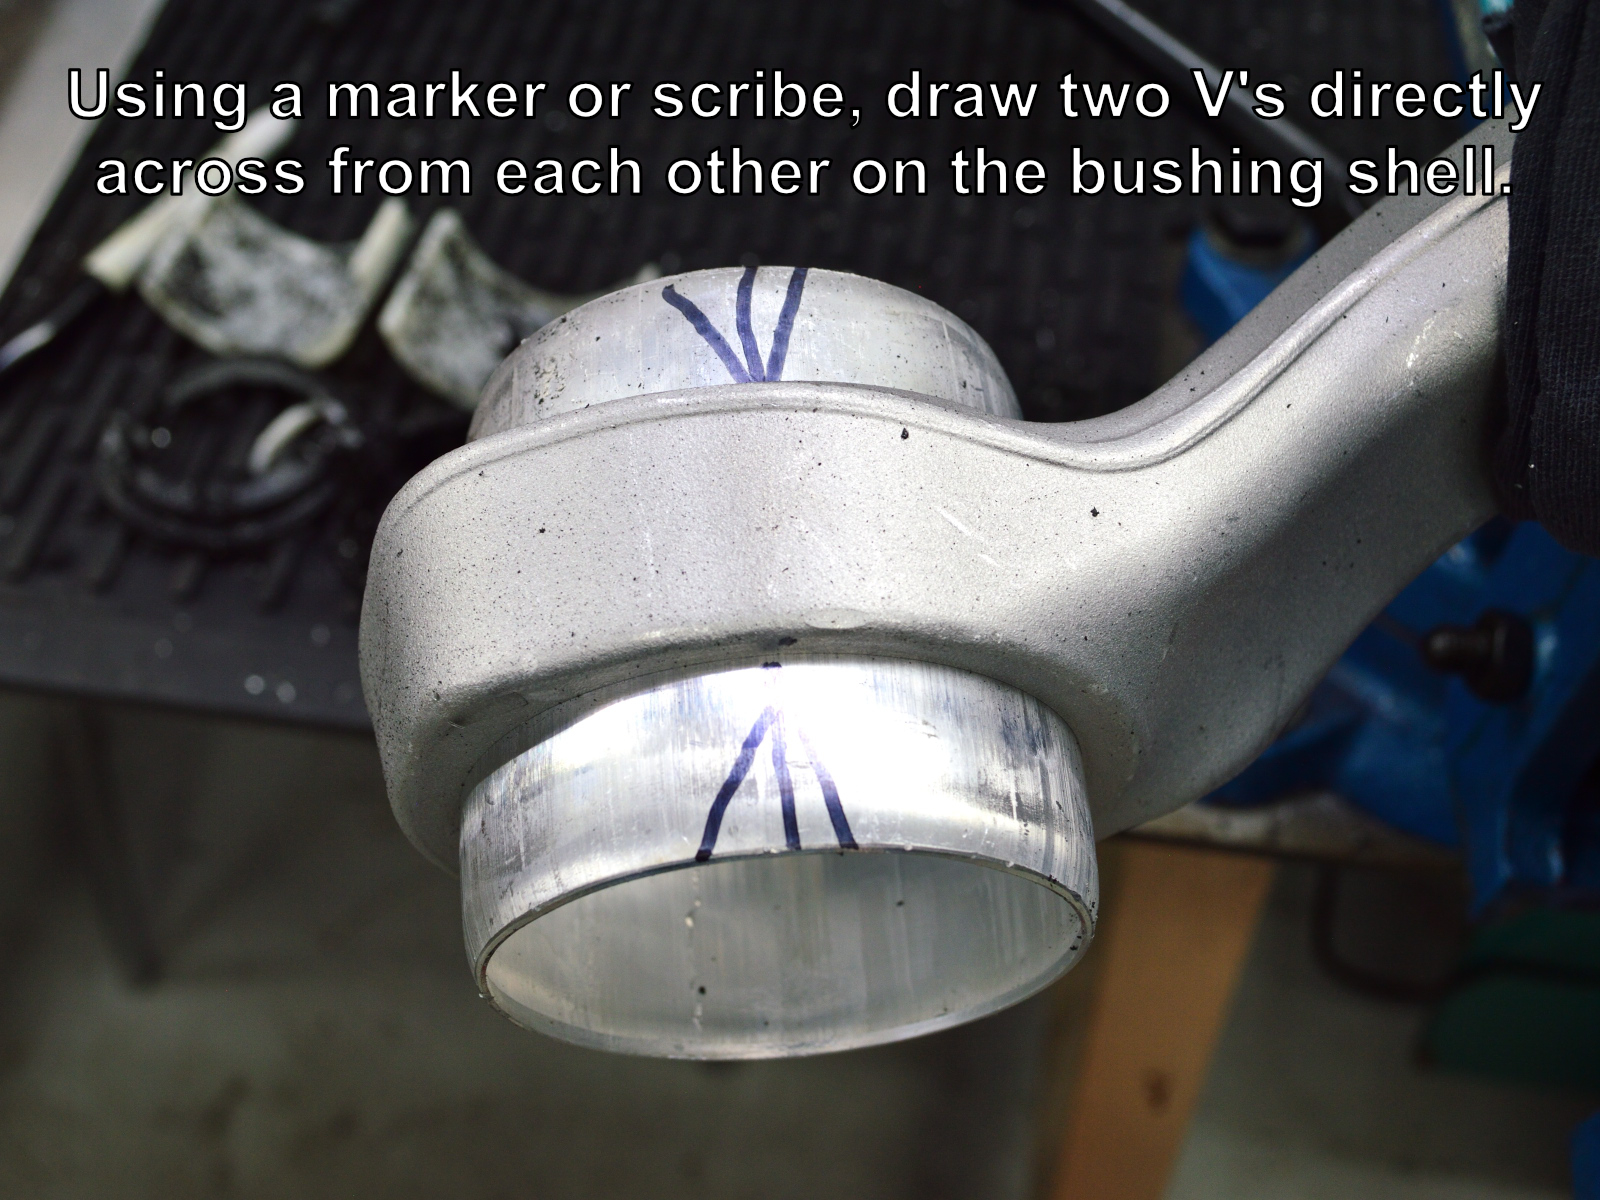
To help aid in the next step, use a marker or scribe to draw two V’s on the outer shell directly across from each other on opposite sides of the control arm as shown.
#11
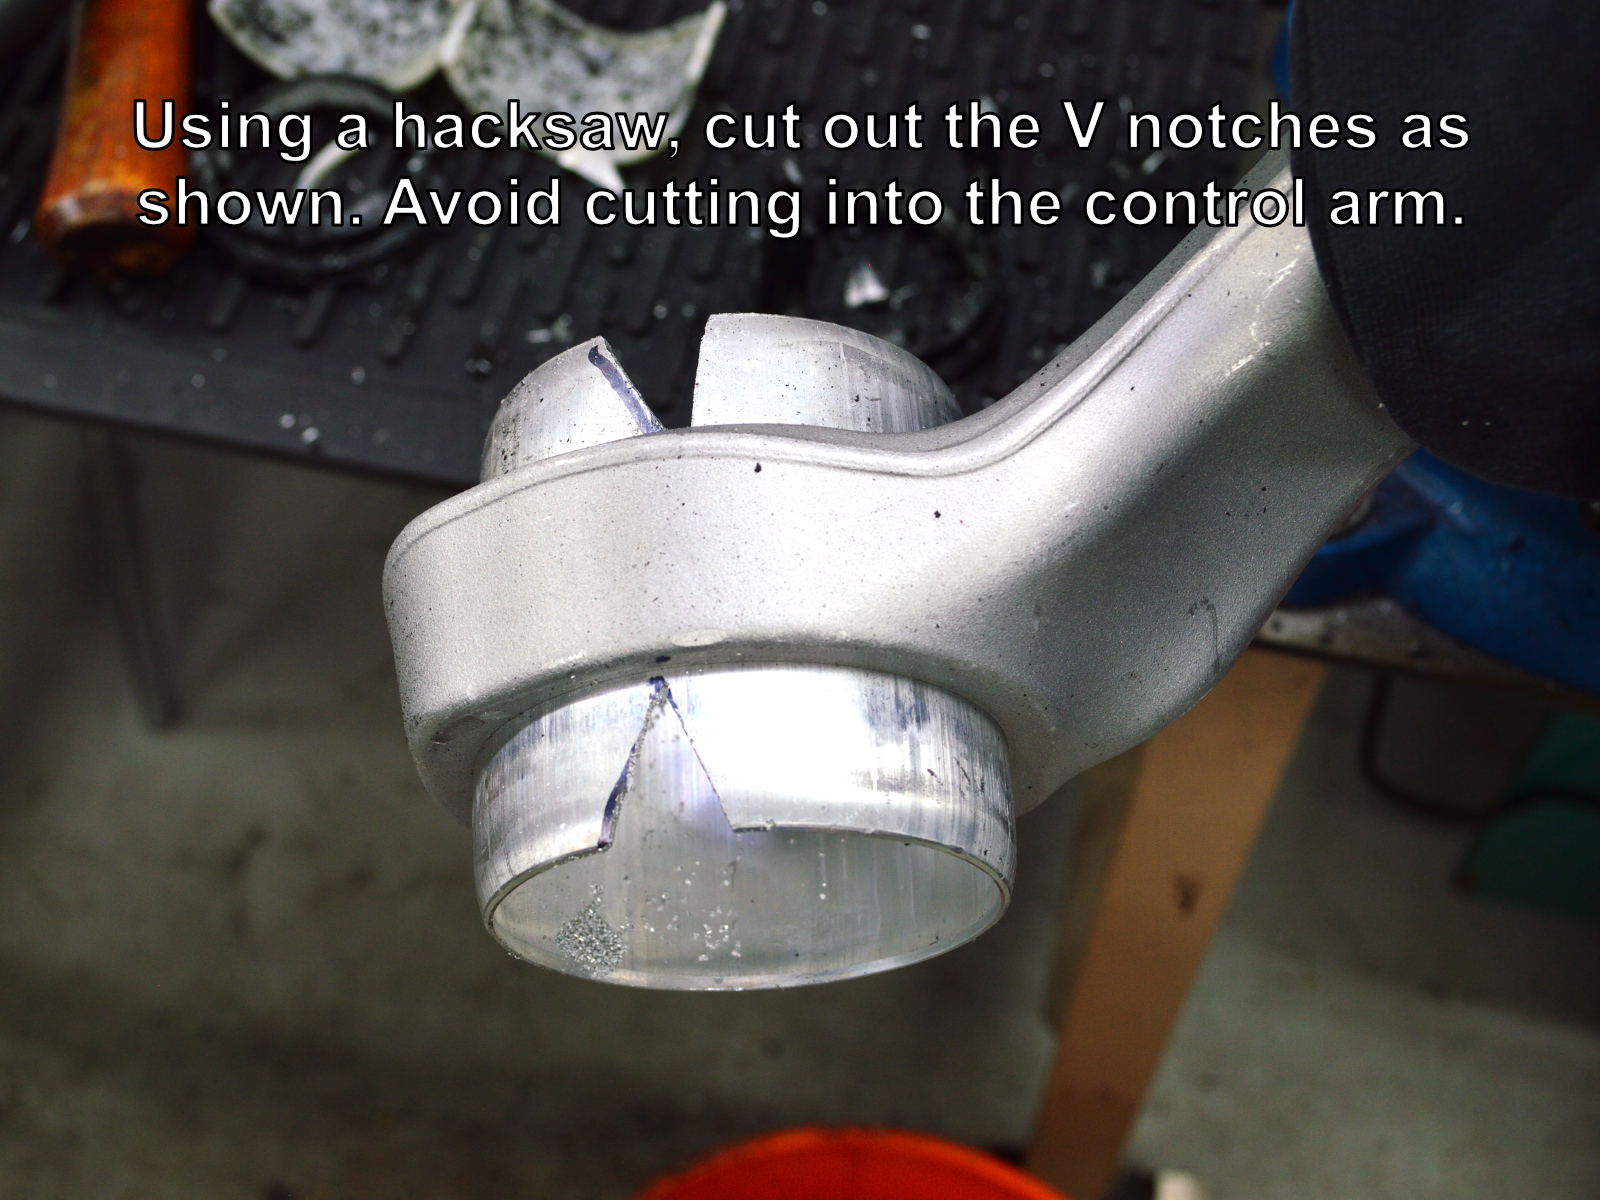
Using a hacksaw, cut out the V shaped pieces as shown. Be careful to not cut into the control arm body.
#12
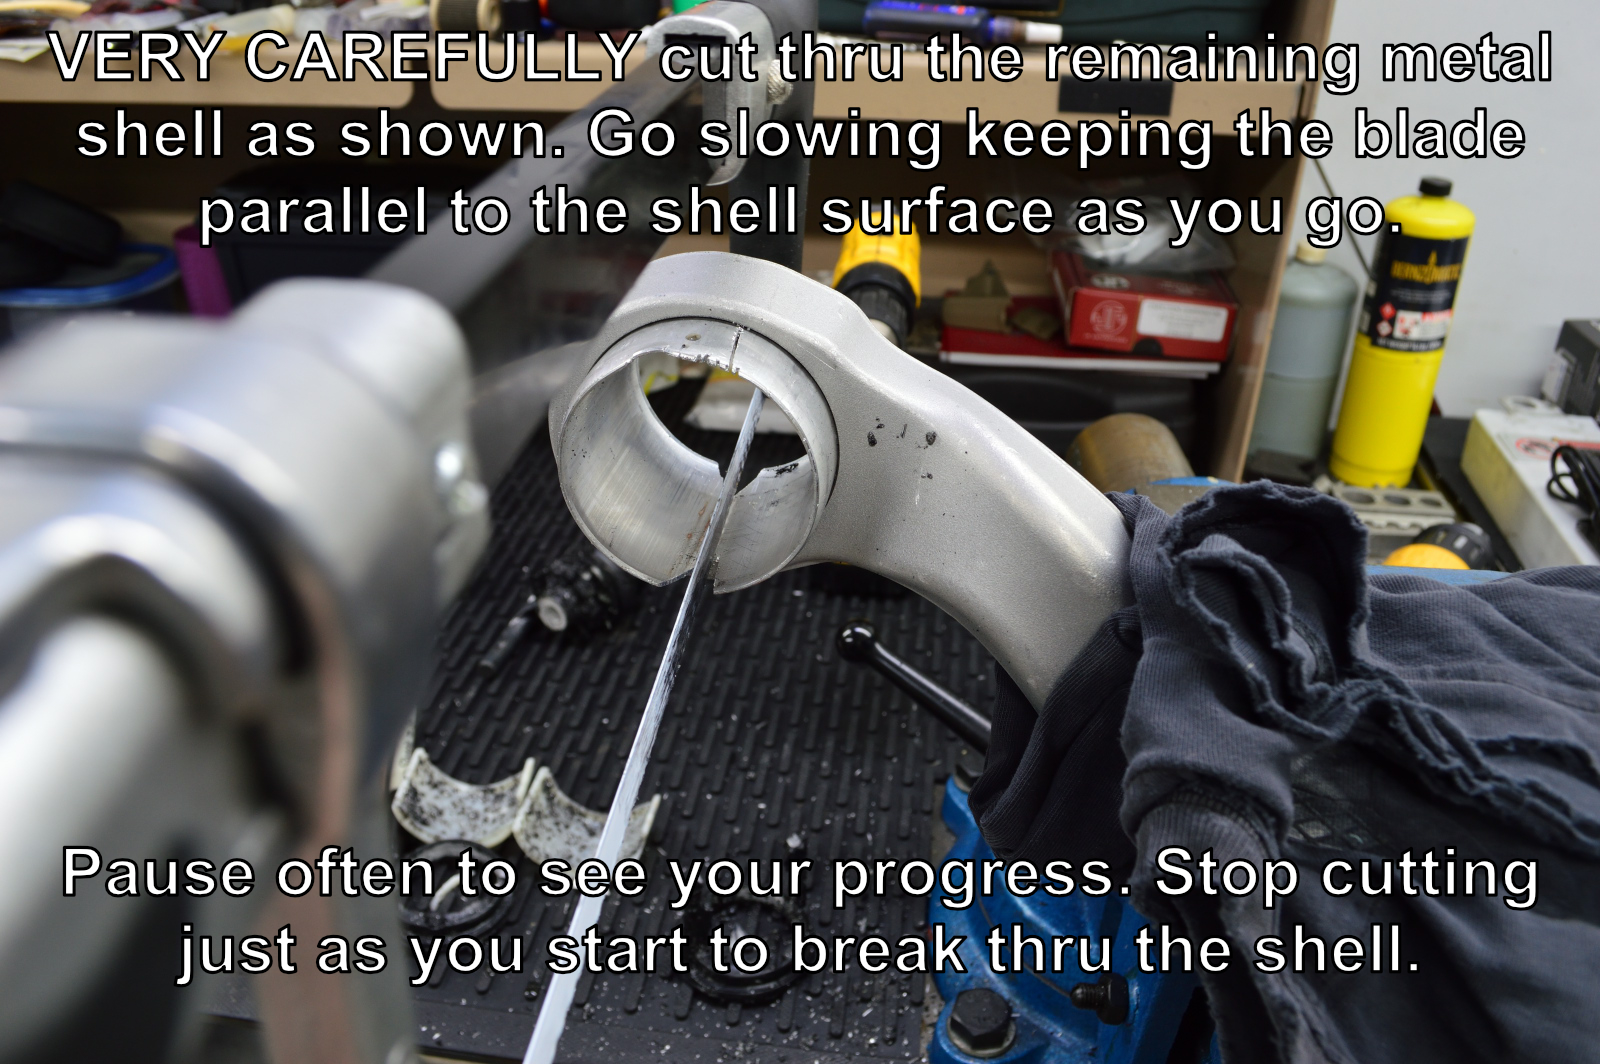
This step is where you need to go slowly and be very careful. The goal is to cut thru the outer shell skin without cutting into the control arm. To use your hacksaw for this, you will need to remove the blade, feed it thru the center of the control arm bore, then reattach it to the saw. When cutting, keep the blade as flat and parallel to the control arm bore as possible. Cut slowly and pause often to monitor your progress. It’s not the end of the world if you slightly cut into the control arm as it will only be cosmetic damage, but it is very possible to do this perfectly. Stop as soon as it appears that you have just cut thru the shell skin.
#13
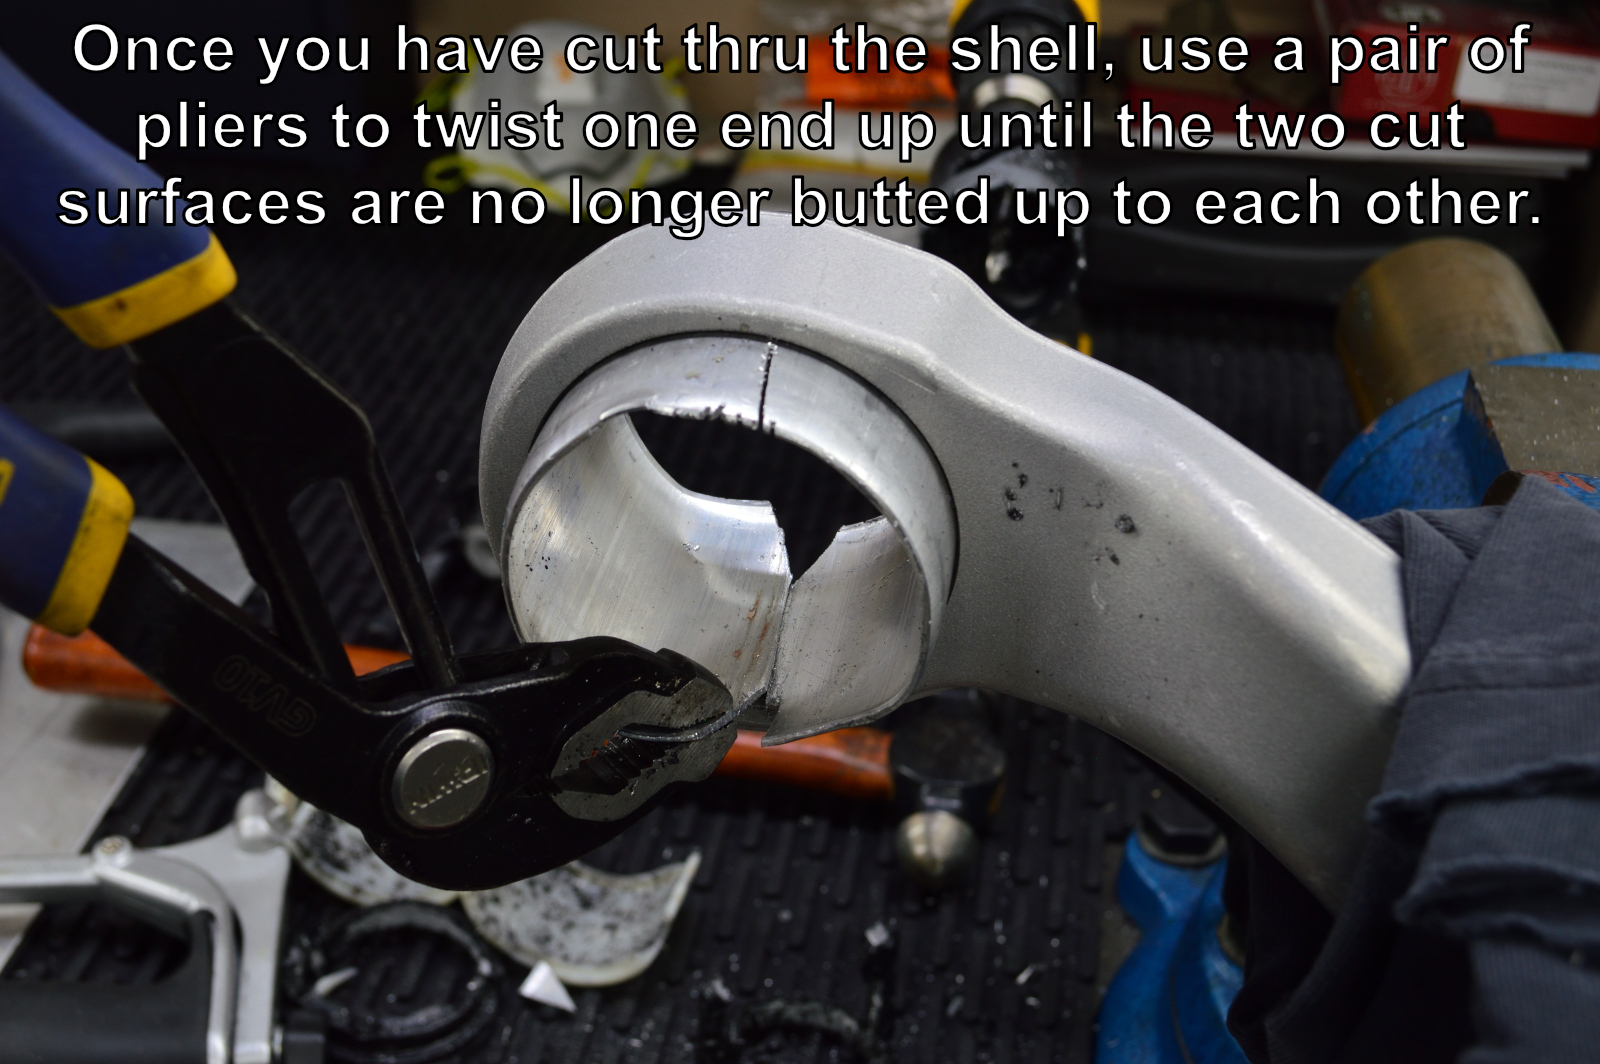
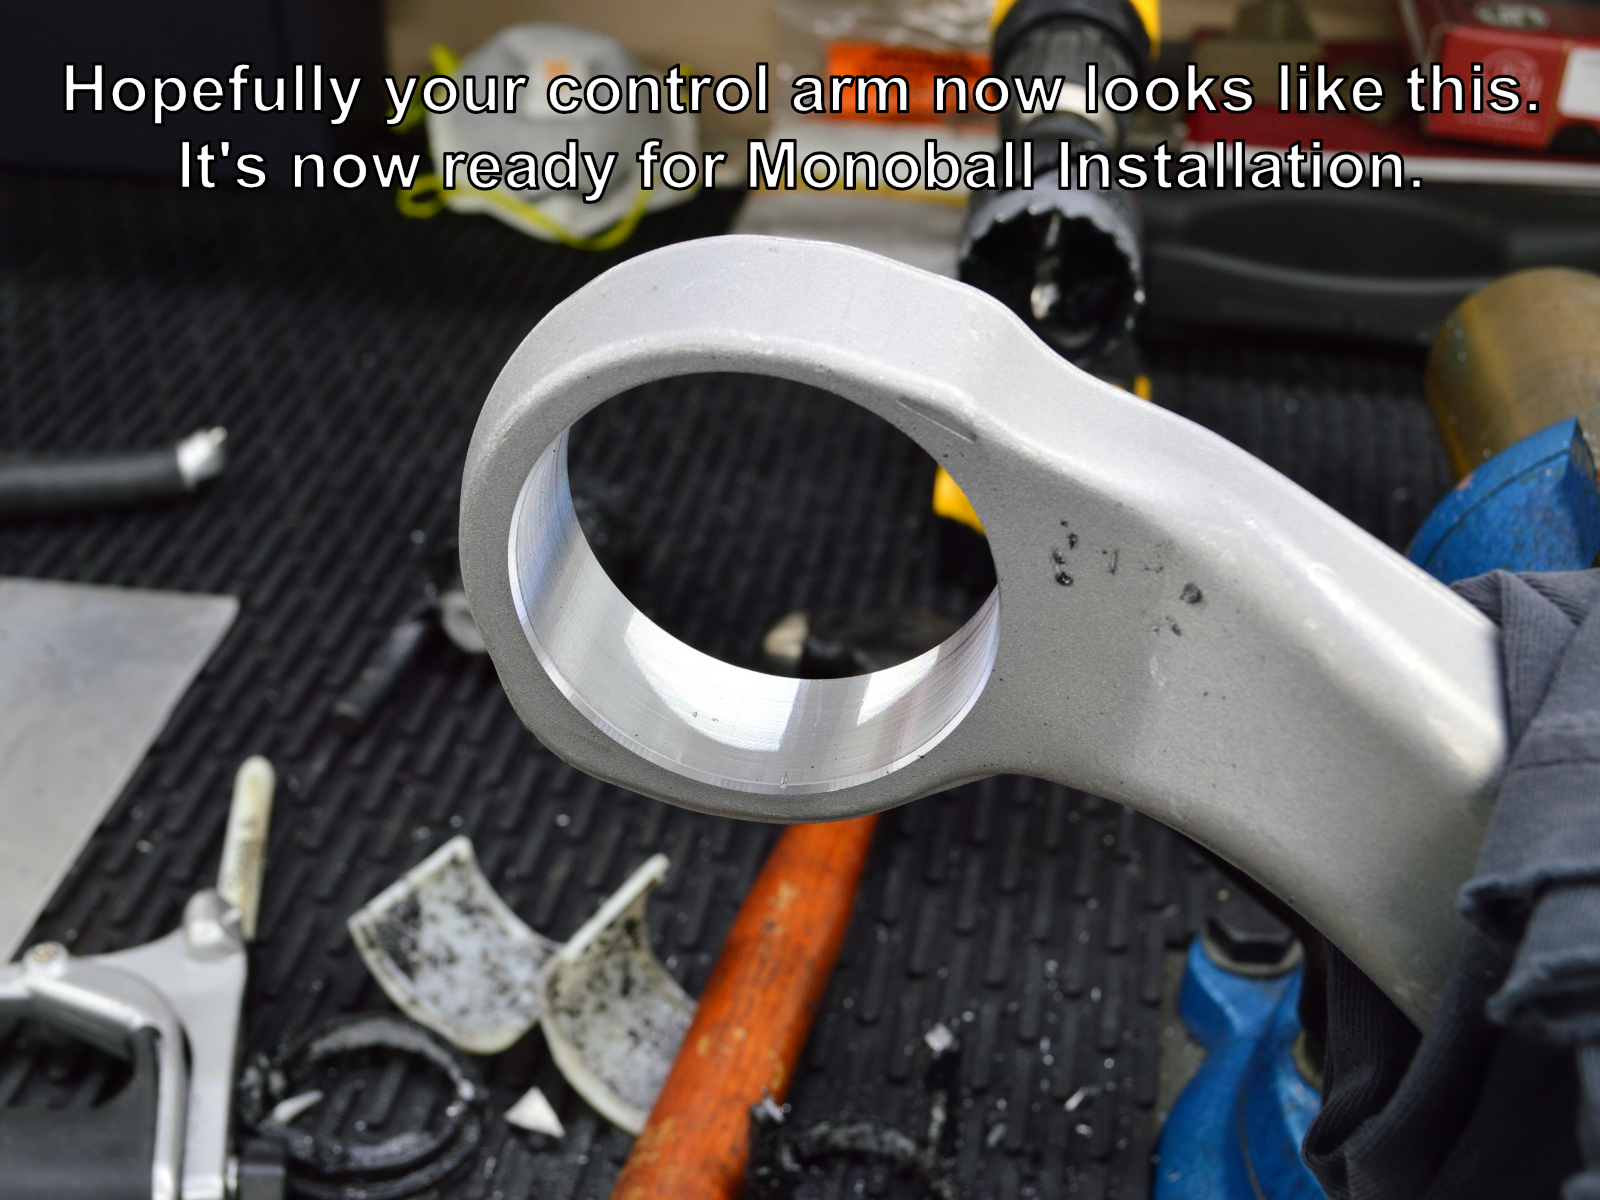
Once you have cut thru the skin, grab one of the edges of the skin with a pair of pliers as shown. Twist the skin to bend it toward the center of the bore until it is no longer butted up against the adjacent edge on the other side of the cut. Now you can either pull the skin out with the pliers, or tap it out with a hammer.